
How to Print Full-Colour Event Badges with Epson ColorWorks
Epson ColorWorks printers are designed for on-demand colour label production. For events, they are most valuable when attendee-specific badges need photographs, category colours, sponsor branding or other variable colour at check-in.
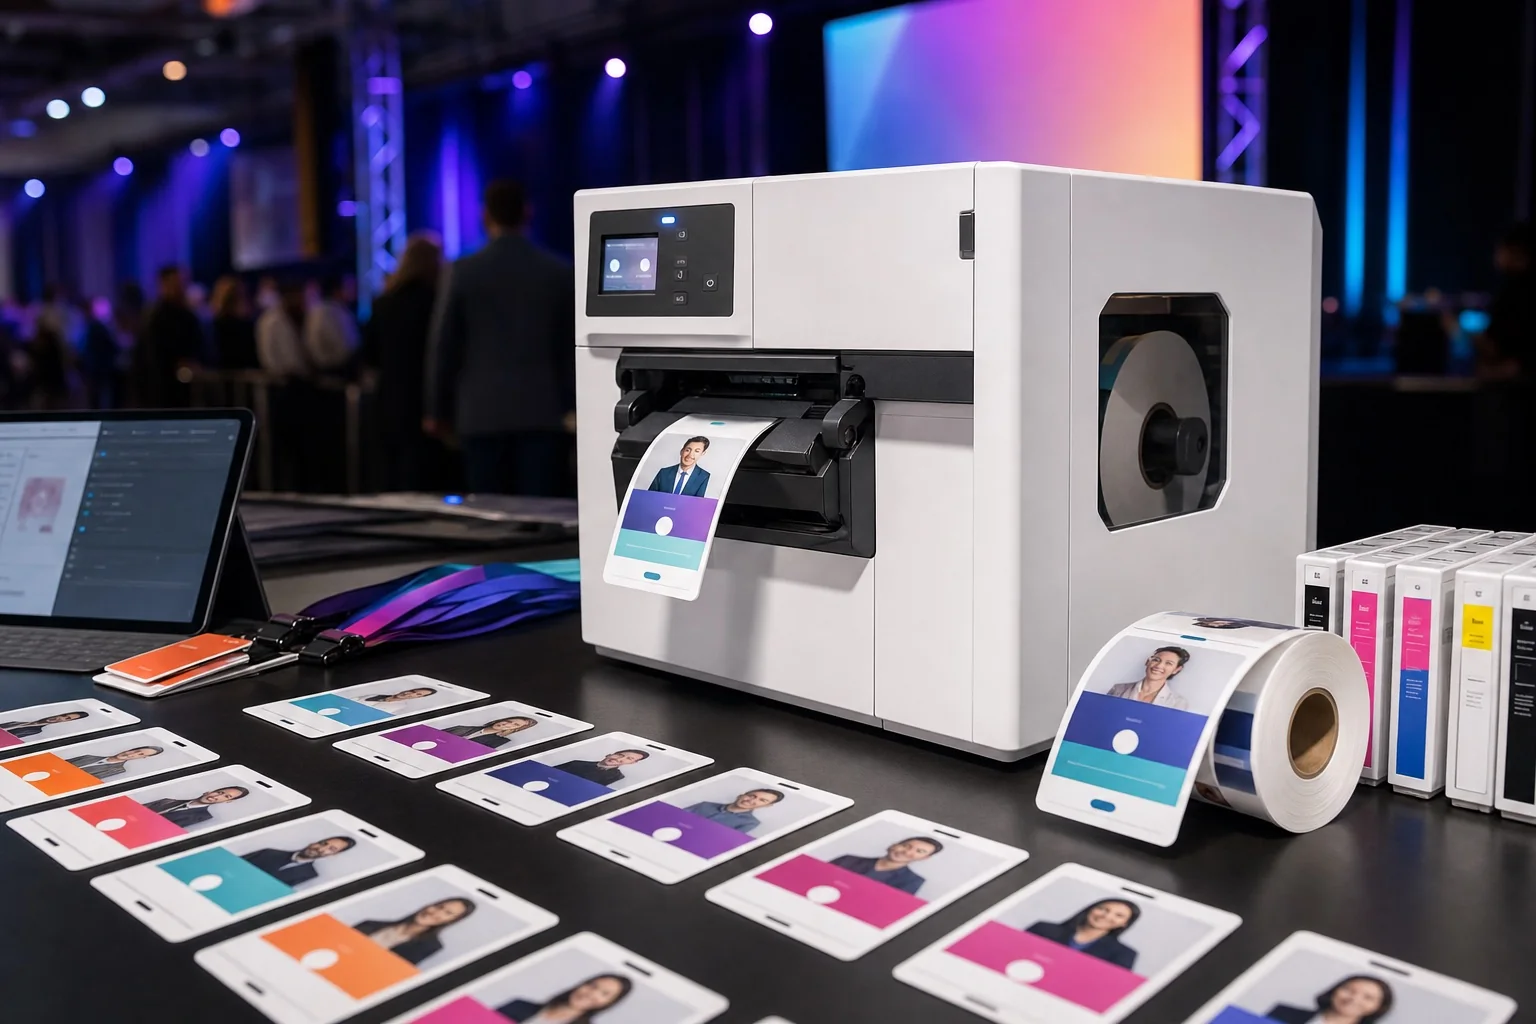
- C4000: compact desktop printer, up to 108 mm listed print width.
- C6000: industrial four-inch colour label class, up to about 108 mm print width.
- C6500: wider industrial class, up to about 212 mm print width.
Epson ColorWorks model comparison
| Model | Listed print width and speed | Media role | Best event use | Main trade-off |
|---|---|---|---|---|
| CW-C4000e | Up to 108 mm; up to 100 mm/s at a specified 300 × 600 dpi mode | Roll and fan-fold; compact desktop | Four-inch-class full-colour badges at smaller/medium setups | Lower production class than C6000; verify event duty and supplies |
| CW-C6000Ae | Up to about 108 mm; model/ink generation dependent | Four-inch industrial colour labels; auto-cutter version | Networked onsite badge production | Larger footprint and cost |
| CW-C6000Pe | Approximately four-inch class with peeler | Peel-and-present applications | Adhesive badges or operational label handoff | Peeler may be unnecessary for non-adhesive passes |
| CW-C6500Ae | Up to about 212 mm; up to 85 mm/s in a stated mode | Wide roll media with cutter | A6, wide passes and central production | Large 26 kg-class footprint and high investment |
| CW-C6500Pe | Wide class with peeler | Peel-and-present wide labels | Specialised adhesive badge workflows | Not a default conference choice |
Epson model and ink-family availability changes. Confirm the exact BK/MK or newer generation, cutter/peeler variant, driver and regional support.
When full-colour onsite badges add value
- Attendee categories use colour to speed visual identification.
- Speaker, sponsor, exhibitor and VIP badges require different brand treatments.
- Attendee photographs are printed at check-in.
- Late registrations must receive the same visual quality as advance attendees.
- Each sponsor or event track receives different artwork.
- A pre-printed shell would create too many stock variations.
If the colour is fixed for every attendee, pre-printing the background may be cheaper and more resilient. Compare the options in pre-printed badge stock versus blank inserts.
How colour label inkjet differs from office inkjet
ColorWorks devices are roll- or fan-fold-media printers designed for repeated label output. They include media handling, sensors, cutter or peeler variants and commercial driver options. An office inkjet normally prints sheets and is less suited to one-at-a-time roll credentials.
Choose the right badge width
| Format | Dimensions | C4000/C6000 | C6500 | Recommendation |
|---|---|---|---|---|
| 4 × 3 in | 101.6 × 76.2 mm | Fits within 108 mm in either useful short-edge orientation | Fits | Strong event format |
| 4 × 6 in | 101.6 × 152.4 mm | 101.6 mm roll width can fit | Fits | Common portrait roll pass |
| A7 | 74 × 105 mm | Fits with 74 or 105 mm across printhead, subject to margins | Fits | Compact colour credential |
| A6 | 105 × 148 mm | 105 mm is within the listed 108 mm maximum, but close enough to require testing | Fits comfortably | Use approved stock and measure printable edges |
| Wide custom pass | Over 108 mm | Does not fit C4000/C6000 print width | Potentially fits up to 212 mm | C6500 or sheet printer |
| CR80 card | 85.60 × 53.98 mm | Printable on flexible label stock, not rigid PVC card path | Same | Use a plastic-card printer for rigid cards |
Use the conference badge dimensions guide and test the completed badge in the actual holder insert area.
Media selection
Colour label printers depend on coated media designed to accept the ink. Options can include matte paper, gloss paper, synthetic media, die-cut labels, black-mark media and continuous rolls. A material that looks acceptable in an office printer is not automatically approved for ColorWorks.
- Confirm media width, thickness, roll diameter and core.
- Choose adhesive or non-adhesive material intentionally.
- Check cutter compatibility and perforation.
- Choose matte stock when scanner glare is a concern.
- Test water, abrasion and drying performance.
- Use the badge paper and cardstock guide for general material concepts, while following Epson’s printer-specific media requirements.
Colour management for event badges
Expect screen-to-print differences
Monitors emit light; printed media reflects it. Brand colours can shift depending on ink set, stock, resolution and driver settings. Obtain approval from a physical proof, not only an on-screen preview.
Create a realistic proof sheet
Include logos, photographs, skin tones, the darkest category colour, fine text and every QR-code background. Print at the intended speed and resolution.
Do not place codes on decorative backgrounds
Reserve a clean light area. Colour can identify a badge category around the code without reducing its contrast. Read QR codes on conference badges for what to encode and how to test.
Prepare the attendee spreadsheet
Full-colour variable output often uses more fields than a basic badge: photo URL or file reference, badge type, sponsor tier, track colour and access category. Use the large-conference attendee spreadsheet template and define a controlled set of categories rather than free-text colour values.
Step-by-step BadgeFlow to ColorWorks workflow
- Confirm the exact ColorWorks model, print width, cutter/peeler variant and ink set.
- Order manufacturer-approved or supplier-validated badge media.
- Install the current Epson driver on every event laptop.
- Create a BadgeFlow badge using the exact finished dimensions.
- Import the attendee list and map names, organisations, categories, codes and photos.
- Build a clear hierarchy using the conference badge design guide.
- Create controlled colour variants for badge types.
- Export one badge per PDF page for roll media.
- Select a custom driver page size matching the badge.
- Choose actual-size or 100% PDF printing.
- Configure media detection and cutter behaviour in the driver/printer.
- Print a colour validation set on the final stock.
- Check dimensions, drying, abrasion, holder fit and code scanning.
- Save the approved driver profile and physical sample.
Cutter versus peeler
An auto-cutter separates completed badges or groups of badges. A peeler separates adhesive labels from their backing for immediate application. Most non-adhesive conference passes benefit from a cutter or perforated tear process rather than a peeler. Do not pay for a peeler without a defined application step.
Networked ColorWorks deployment
- Use stable printer names and reserved network addresses.
- Standardise driver and colour settings.
- Prevent operators from changing resolution or colour mode casually.
- Keep ink and media status visible to a supply manager.
- Maintain an approved monochrome fallback design.
- Use local PDF files if internet availability is uncertain.
- Follow the complete onsite badge printing setup guide.
C4000 versus C6000 versus C6500
| Requirement | C4000 | C6000 | C6500 |
|---|---|---|---|
| Compact desktop footprint | Best | Larger | Largest |
| Four-inch badge width | Yes | Yes | Yes |
| A6 short-edge width | Potentially; test 105 mm on 108 mm maximum | Potentially; test | Comfortable |
| Wide badge over 108 mm | No | No | Yes, within model limits |
| Higher-duty central production | Limited compared with industrial models | Strong | Strong and wide |
| Lower initial investment | Generally strongest candidate | Higher | Highest |
| Multiple registration desks | Possible; assess duty and spare strategy | Strong where budget allows | Usually centralised due to size |
ColorWorks versus thermal and laser
| Comparison | ColorWorks advantage | Alternative advantage |
|---|---|---|
| Versus Zebra thermal | Full colour, photos and category graphics | Thermal is simpler and avoids ink |
| Versus Brother/DYMO | Wider and full colour | Compact printers cost less and fit simple labels |
| Versus colour laser | One badge at a time on roll media | Laser is economical for advance sheets |
| Versus pre-printed shells | Every element can remain variable | Pre-printing reduces onsite colour-printer dependency |
For a complete technology comparison, read thermal versus laser versus inkjet badge printing.
Cost framework
Price the printer, spare printer or fallback, ink consumption, maintenance box where applicable, approved stock, setup waste, cleaning, event laptop, networking and technical operator. Dynamic full colour can reduce pre-printed-stock variations, but it should solve a real requirement.
Common ColorWorks badge problems
| Problem | Likely cause | Fix |
|---|---|---|
| Brand colours differ | Stock/profile/driver difference | Approve physical proof and lock settings |
| Ink smears | Unsuitable media or insufficient drying | Use approved coated stock and retest |
| QR code fails | Busy/dark background or glare | Use a white code zone and matte stock |
| Badge is clipped | Custom page exceeds printable width | Reduce width or choose C6500/wider process |
| Cut position is wrong | Page length or media detection mismatch | Match PDF, driver and stock pitch |
| Photos are too dark | Image/driver colour settings | Create a calibrated proof and adjust source |
| Queue pauses | Large raster jobs or network issue | Simplify artwork, test local path and split batches |
| Unexpected ink depletion | Dense full-bleed artwork | Reduce unnecessary coverage and monitor supplies |
| Media jams or curls | Unsupported stock or storage | Use validated media and correct environmental storage |
Backup strategy
If every attendee is printed onsite in colour, one printer failure can stop a lane. Maintain a configured spare, or prepare a fallback that prints names and codes in monochrome on pre-branded stock. The fallback must be tested, not merely documented.
Choosing C4000, C6000 or C6500 from operations
C4000 for distributed desktop stations
The C4000’s compact size makes it easier to place at several registration desks. Evaluate the expected duty, ink replacement process and spare strategy. It may be more economical to operate several C4000 stations than several industrial units, but only a timed test can confirm capacity.
C6000 for controlled four-inch production
The C6000 class offers industrial positioning and a four-inch print width. Cutter and peeler variants support different handoff processes. It is a strong candidate for a central print desk or demanding registration environment where the badge remains within the four-inch class.
C6500 for wide passes
The C6500’s listed 212 mm print width supports wide credentials and large formats. Its footprint and weight favour centralised production rather than placing one at every narrow registration counter.
Photo-badge workflow
- Define an approved photo aspect ratio and minimum pixel dimensions.
- Crop photographs consistently before the event where possible.
- Use a neutral background or controlled frame.
- Do not allow a photo to reduce the attendee name below a readable size.
- Print a range of skin tones and lighting conditions on the real stock.
- Check whether the photo remains recognisable after holder glare.
- Keep identity verification independent from print colour accuracy.
Building a colour-proof page
Create one PDF containing:
- Every event logo and sponsor logo
- All role and access colours
- A greyscale ramp
- Fine black and reversed text
- Photographs with different skin tones
- QR codes on the lightest and darkest approved backgrounds
- Large solid coverage areas
Approve the physical output using the final driver, resolution, speed, ink set and media. A proof from a different paper is not sufficient.
Ink and consumable management
- Record cartridge levels before venue build.
- Stage replacement cartridges at the technical desk.
- Train one operator to replace consumables.
- Prevent unplanned cleaning cycles during peak check-in where possible.
- Estimate coverage from realistic badge artwork.
- Keep maintenance items required by the model available.
- Store ink according to Epson guidance.
Media testing matrix
| Test | Paper matte | Gloss | Synthetic |
|---|---|---|---|
| Colour saturation | Good starting point | Often vivid | Stock dependent |
| QR-code glare | Usually lower | Higher risk | Finish dependent |
| Drying/smudge | Test | Test carefully | Test carefully |
| Water resistance | Limited unless coated | Coating dependent | Often stronger but must be verified |
| Holder insertion | Usually easy | Can stick or reflect | Thickness/flexibility varies |
| Cutter behaviour | Usually predictable | Coating can create debris | Material-specific |
ColorWorks event scenarios
500-person brand conference
Use two C4000-class stations and one tested fallback, or pre-print the stable majority and use one colour exception station. Dynamic category colour can be valuable if registrations change late.
2,000-person trade show
Use controlled central production with C6000-class devices or a fleet sized from load tests. Maintain separate exhibitor and attendee queues and monitor ink/stock centrally.
Wide A6 or custom VIP pass
Use a C6500-class printer only when the wide media and visual result justify the footprint. Otherwise print A6 in advance using a sheet or commercial process.
Colour-code accessibility
Do not communicate role or access through colour alone. Add a text label such as SPEAKER, STAFF or VIP, and maintain sufficient contrast. Consider colour-vision deficiencies when selecting categories. Use borders, patterns or icons as secondary cues where helpful.
Maintenance routine
- Inspect nozzles and run the manufacturer’s approved check.
- Clean cutter and media path as directed.
- Remove dust before loading roll stock.
- Keep the printer powered and maintained according to guidance.
- Print a control badge before each operating period.
- Record recurring nozzle or feed issues and replace the unit before a critical event.
Questions for an Epson reseller
- Which exact model, ink set and cutter/peeler version is included?
- Which non-adhesive event media has been validated?
- What are the recommended driver and colour settings?
- What supplies are available locally?
- What maintenance items are required?
- Can the reseller produce a physical proof from a BadgeFlow PDF?
- What spare or replacement support is available during the event?
- What training is included?
Fallback design for colour-printer failure
Create a monochrome version that preserves name, organisation, role text and code. Print it on blank or pre-branded stock using a thermal or laser device. Confirm that the fallback badge fits the same holder and remains acceptable to access and registration teams.
Speed versus quality modes
Epson publishes speed figures at specified resolutions and print widths. Higher-resolution modes can improve fine detail but reduce throughput. Create a test matrix using the actual badge:
| Mode test | Measure | Approve when |
|---|---|---|
| Faster/lower resolution | Time for 50 badges; code quality | Codes and names remain reliable |
| Balanced | Time, colour and photo quality | Meets visual and throughput goals |
| High resolution | Fine text and photographs | Benefit justifies slower output |
| Reduced coverage design | Ink use and drying | Brand requirements remain satisfied |
File preparation for photographs and logos
- Use sufficient source resolution at the final printed size.
- Avoid upscaling small attendee photos aggressively.
- Use transparent or clean-background logo files.
- Check very thin white logo elements on coloured backgrounds.
- Crop photos consistently.
- Keep text as vector/PDF text where the workflow supports it.
- Inspect the exported PDF at high zoom and in print.
Colour-category governance
Define a controlled badge-type table:
| Badge type | Text label | Primary colour cue | Fallback cue |
|---|---|---|---|
| Attendee | ATTENDEE | Blue band | Text and border |
| Speaker | SPEAKER | Purple band | Microphone icon plus text |
| Staff | STAFF | Black band | Large STAFF text |
| VIP | VIP | Gold/yellow band | VIP text and border |
| Exhibitor | EXHIBITOR | Green band | Booth field |
| Press | PRESS | Red band | PRESS text |
Choose colours with sufficient text contrast and never make access depend only on hue.
Redundancy options for expensive colour hardware
- Identical spare ColorWorks device.
- Second colour printer serving reserve capacity.
- Pre-branded stock plus Zebra thermal personalisation.
- Office laser fallback for paper inserts.
- Plain emergency credential with manual verification.
Test the chosen fallback in the same holder and registration process.
Production batch strategy
Even when a ColorWorks printer supports on-demand output, advance batches can reduce event-day dependence. Print confirmed staff, speakers and exhibitors before the event; reserve dynamic onsite output for attendees and changes. Separate photo-heavy and simple designs if their print times differ substantially.
Final ColorWorks preflight
- Exact model and ink set confirmed
- Approved media and roll dimensions recorded
- Physical colour proof approved
- QR-code light zone validated
- Photo crop and resolution standards applied
- Custom page size matches stock
- Cutter/peeler mode correct
- Fifty-badge performance run completed
- Ink and maintenance supplies staged
- Monochrome fallback tested
Frequently asked questions
Which Epson ColorWorks printer is best for event badges?
The C4000 suits desktop four-inch-class colour badges, the C6000 suits more demanding four-inch production, and the C6500 is relevant when you need media up to roughly eight inches wide. Choose from the actual badge width and workflow.
Can ColorWorks print photographs on badges?
Yes, with compatible coated media and an appropriate resolution mode, but colour and photo quality must be tested on the actual stock.
Does BadgeFlow print directly to Epson ColorWorks?
BadgeFlow exports PDFs. Print through the Epson driver using a custom page size that matches the stock. BadgeFlow does not configure the cutter, peeler or media sensor.
Is the C4000 wide enough for A6 badges?
Its listed maximum print width is 108 mm, which is wider than the 105 mm A6 short edge. The actual stock, orientation and printable margins still need to be tested.
What is the difference between C6000 and C6500?
The C6000 is approximately four-inch class with a listed maximum print width around 108 mm, while the C6500 supports much wider media with a listed maximum print width around 212 mm.
Should I use colour backgrounds behind QR codes?
Keep a high-contrast light area around the code. Avoid gradients, photographs and dark category colours behind it.
Do I need a spare colour badge printer?
For a workflow that prints every badge onsite, yes—either a configured spare ColorWorks unit or a tested monochrome/pre-printed fallback.
Is full-colour onsite printing worth the cost?
It is worthwhile when dynamic colour, photos or sponsor treatments materially improve operations or the attendee experience. It may be unnecessary when fixed branding can be pre-printed.
Official Epson references
Epson and ColorWorks are trademarks of Seiko Epson Corporation. BadgeFlow is not affiliated with, tested by or endorsed by Epson.