
How to Set Up Onsite Badge Printing for Conferences
Onsite badge printing is an operations system, not a printer purchase. A reliable setup combines clean attendee data, a tested badge design, compatible media, sufficient station capacity, trained staff, spare hardware and a documented fallback process.
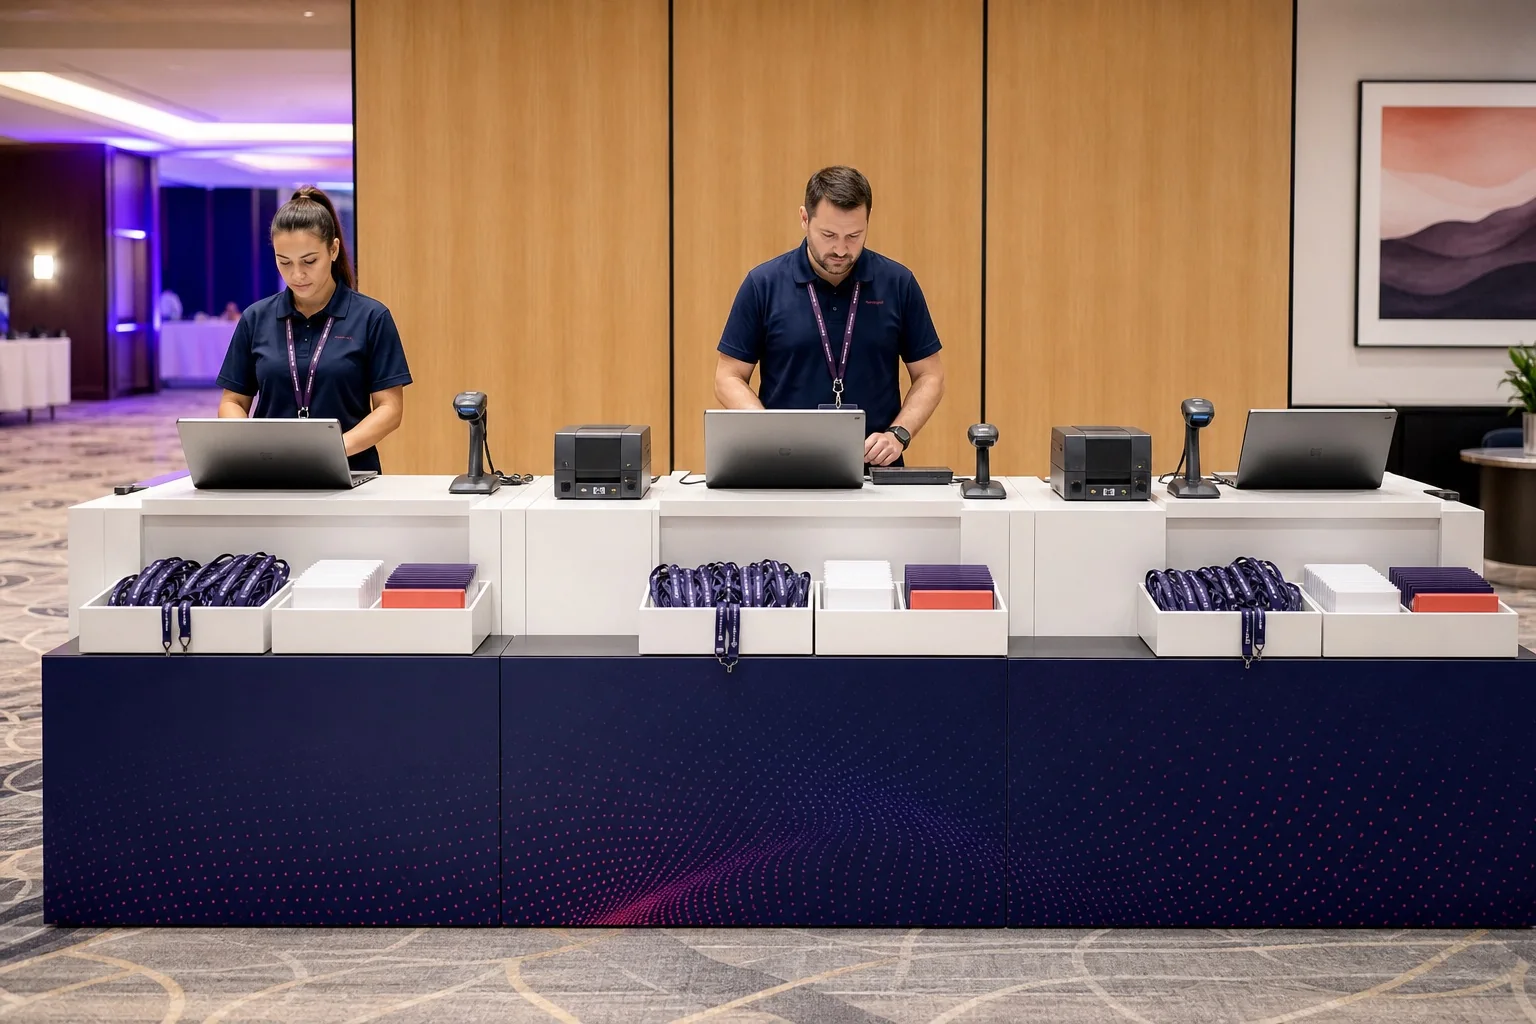
For a concise introduction, start with BadgeFlow’s onsite badge printing overview. This guide goes further into timeline, capacity calculation, desk architecture, load testing and failure recovery.
Choose the printing model
| Model | How it works | Best for | Main risk |
|---|---|---|---|
| Print every badge onsite | Each arrival triggers or requests a new badge | Highly dynamic events and self-service systems | Peak queues depend on every technical component |
| Pre-print plus exception desk | Most badges are ready; exceptions are printed separately | Most conferences | Sorting and uncollected badges |
| Pre-branded shell plus personalisation | Fixed colour branding is printed first; attendee data is added onsite | Premium branding with dynamic data | Second-stage alignment and stock compatibility |
| Central print desk | Several check-in lanes send work to a shared production area | Controlled medium/large events | Job identification and handoff delay |
| Printer at every lane | Each operator controls a printer | Parallel throughput | More hardware, drivers and supplies |
| Self-service kiosk | Scan or lookup triggers automated print | Repeatable high-volume programmes | Integration, support and accessibility complexity |
Use the pre-printed stock versus blank inserts comparison before deciding that every attendee must be printed at arrival.
Eight to twelve weeks before the event
- Estimate total attendance and the likely peak arrival window.
- Choose the physical format using the conference badge size guide.
- Order sample holders and confirm the insert with the badge holder size guide.
- Decide whether colour is operationally necessary.
- Define attendee, speaker, staff, exhibitor, sponsor and VIP categories.
- Decide what the QR code or barcode will do.
- Select pre-print, onsite or hybrid production.
- Identify the owner of data, hardware, printer settings and event-day escalation.
Six to eight weeks before
Select the printer class
| Printer class | Use onsite | Use in advance | Typical role |
|---|---|---|---|
| Office laser | Possible but awkward one at a time | Excellent | Main batch and paper inserts |
| Compact Brother/DYMO thermal | Excellent for narrow labels | Good | Visitor, walk-in and replacement labels |
| Four-inch Zebra thermal | Excellent | Good | Monochrome conference passes |
| Epson ColorWorks | Excellent when colour is required | Good | Full-colour variable badges |
| Plastic-card printer | Possible for controlled staff issue | Good | Durable staff and access cards |
Compare the hardware in the best badge printers for conferences and events.
Order and test media
Record width, length, thickness, coating, roll diameter, core, gap, notch or black-mark position, perforation and holder compatibility. For paper and card, use the badge paper and cardstock guide. Do not wait until event week to discover that a branded shell cannot pass through the intended printer.
Four weeks before: build the attendee-data model
Use one canonical attendee table rather than multiple uncontrolled printer lists. A practical structure is:
attendee_id
first_name
last_name
organisation
job_title
badge_type
access_level
qr_token
registration_status
checked_in_at
badge_printed_at
print_station
reprint_count
The attendee spreadsheet template for large conferences explains category, access and code fields. Use a unique, non-sensitive token for scanning. Decide what the code does with the QR codes on conference badges guide and compare formats in barcode versus QR code.
Three to four weeks before: create the BadgeFlow template
- Set the exact finished badge or insert dimensions.
- Create a large readable attendee-name zone.
- Add organisation and role only if they remain legible.
- Create controlled variants for staff, speaker, sponsor, exhibitor and VIP.
- Add a QR code or barcode with a clean quiet zone.
- Import realistic test data including long names and blank values.
- Export a sheet-based PDF for advance printing or one badge per page for roll printers.
- Print at actual size and fit the badge into the real holder.
- Scan the completed badge while worn, not only flat on a desk.
Use the conference badge design best practices to control typography and hierarchy.
Two weeks before: calculate capacity
A useful planning approximation is:
Required active stations ≈ peak arrivals per minute × average service time in minutes ÷ target utilisation.
Use a target utilisation below 100% so the system can absorb variation. Then add reserve capacity and a separate exception process.
Worked example
A conference expects 720 attendees during its busiest hour: 12 arrivals per minute. A normal check-in cycle takes 30 seconds, or 0.5 minutes. At 75% target utilisation:
12 × 0.5 ÷ 0.75 = 8 active normal stations
This does not mean eight printers are always required. Pre-printed badges may reduce the print step; a central print desk may serve several lanes; exceptions may need separate capacity. Load-test the chosen architecture.
Measure complete service time
- Scan invitation or search attendee.
- Confirm identity and record status.
- Resolve missing or changed details.
- Generate or locate the correct badge page.
- Send and spool the job.
- Print and cut.
- Insert into holder or attach lanyard.
- Hand over and reset the station.
A quoted printer speed is only one element. The normal lane should avoid corrections, ticket transfers and access disputes.
Registration-desk architecture
Normal lane
Handles correct, expected records. The sequence should be linear: identify, print or retrieve, assemble, hand over.
Exception lane
Handles walk-ins, spelling changes, duplicates, transfers and missing access. Follow the instant badge reprints and walk-ins workflow so one issue does not stop a normal line.
Technical zone
Keep spare printers powered, loaded and calibrated. Diagnose failed hardware away from attendees.
Supply zone
Store labelled rolls, ink, ribbon, holders and lanyards by station. Operators should not abandon desks to find supplies.
Network design
| Connection | Best use | Controls |
|---|---|---|
| USB | Simple one-printer-per-station setup | Label cables; disable accidental queue changes |
| Ethernet | Shared predictable network | Reserve addresses, test switch ports, label printers |
| Wi-Fi | Flexible placement | Test congestion, credentials and roaming; retain wired fallback |
| Internet-dependent cloud workflow | Live registration sync | Prepare offline attendee export and local approved PDF |
| Local printer network | Keeps print path independent of internet | Document addressing and laptop permissions |
Avoid automatic operating-system, browser or driver updates during event week. Record the known-good versions.
Power and physical safety
- Confirm venue circuits and total load.
- Do not put all stations on one unprotected power point.
- Use cable covers where attendees cross paths.
- Keep spare power supplies labelled by printer.
- Prevent laptops from sleeping during peak check-in.
- Place printers so output does not fall onto the floor.
- Keep drinks away from media and electronics.
Staffing roles
| Role | Responsibility | Can be combined? |
|---|---|---|
| Greeter/queue manager | Directs attendees and identifies exceptions early | Yes at small events |
| Lookup operator | Finds attendee and confirms record | Often with printer operator |
| Print operator | Selects badge and manages queue | Yes when workflow is simple |
| Assembly operator | Holder, lanyard and handoff | Can support several printers |
| Exception specialist | Edits data and approves reprints | Keep separate at busy events |
| Technical support | Swaps equipment and restores stations | Shared across stations |
| Stock manager | Monitors media and consumables | Combined with technical support |
Load-test the workflow
Run a timed simulation with realistic scenarios:
- Correct pre-registered attendee
- Longest name and organisation
- Missing organisation
- Accented or non-Latin characters
- Wrong badge type
- Duplicate attendee
- Walk-in registration
- Name correction
- Replacement badge
- QR code that fails to scan
- Printer offline
- Network unavailable
- Stock change and recalibration
- Spare printer swap
Record average and 95th-percentile service time, not only the fastest attempt.
Day-before checklist
- Every printer outputs the approved sample at actual size.
- Every QR or barcode scans with each scanner model.
- Every station has the same template version and driver settings.
- Roll printers are calibrated to the event stock.
- Spare printers are powered, connected and loaded.
- Offline data and local PDFs are accessible.
- Exception operators can edit and regenerate a badge.
- Stock, holders and lanyards are counted by station.
- The team has the conference check-in and badge printing checklist.
Event-day procedure
- Open and power all stations before the advertised arrival time.
- Print and scan a control badge at every station.
- Confirm data version and registration synchronisation.
- Route uncertain attendees to the exception lane immediately.
- Monitor queue length, service time, stock and faults centrally.
- Open reserve stations before the normal lanes become saturated.
- Swap a failed printer rather than debugging it in the live lane.
- Record reprints and destroy superseded credentials when relevant.
- Reconcile printed badges with check-ins after the peak.
Failure-response matrix
| Failure | Immediate action | Fallback | Prevention |
|---|---|---|---|
| Printer stops | Move queue or swap calibrated spare | Use another station or office-printer insert | Pre-configured spare and labelled cables |
| Network outage | Use local files and direct connection | Offline attendee export | Test local degraded mode |
| Internet outage | Continue from local data where allowed | Manual reconciliation later | Download approved data before doors |
| Laptop fails | Replace with imaged spare | Move printer to adjacent station | Test spare laptop and drivers |
| Wrong dimensions | Stop output and revert to approved PDF/settings | Use blank emergency badges | Lock template and save screenshots |
| QR codes fail | Use manual lookup or alternate identifier | Reprint after correction | Scan-test assembled badges |
| Stock shortage | Open contingency stock and prioritise essential credentials | Local supplier or plain insert fallback | Monitor burn rate and over-order rationally |
| Long queue | Open reserves and divert exceptions | Issue temporary manual badge if appropriate | Load testing and early monitoring |
| Printer loses calibration | Swap unit or recalibrate away from queue | Use adjacent printer | Calibrate after each stock change |
| Colour ink runs out | Swap cartridge or printer | Use monochrome fallback design | Track levels and stage consumables |
Equipment checklist
Per station
- Printer and power supply
- Laptop/check-in device
- Data cable or tested network path
- Loaded media
- Approved control badge
- Holder and lanyard supply
- Operator instruction card
Shared spares
- Configured spare printers
- Spare laptops
- Power supplies and cables
- Extra media, ink, toner or ribbons
- Cleaning kit
- Offline attendee export
- Approved PDF files
- Blank badges and permanent markers
Documents
- Station map
- Escalation contacts
- Driver-setting screenshots
- Badge-type definitions
- Reprint policy
- Stock count sheet
- Failure procedure
The budget event badge printing guide can help identify economical fallbacks without pretending that a marker pen is equivalent to a normal professional badge.
Post-event review
Record total output, walk-ins, corrections, duplicate reprints, waste, unused personalised badges, media consumed, printer faults, queue peaks and staff feedback. Use the evidence to decide whether the next event should print later, pre-print more or invest in additional onsite capacity.
Additional capacity examples
Example A: 300 attendees over 45 minutes
The average is 6.7 arrivals per minute, but assume the peak is 9. If each normal check-in takes 20 seconds (0.333 minutes) and target utilisation is 70%:
9 × 0.333 ÷ 0.70 = 4.28
Plan at least five active normal stations, then assess whether a separate exception position and reserve station are required.
Example B: 1,200 attendees over 60 minutes
Assume 20 arrivals per minute and a 25-second service cycle (0.417 minutes). At 75% utilisation:
20 × 0.417 ÷ 0.75 = 11.12
Twelve active lanes are the mathematical starting point. Pre-printed badge collection may reduce the cycle; full onsite colour printing may increase it. Simulate the exact workflow.
Example C: timed arrivals
If attendees have assigned arrival windows, the same total event may need fewer stations. The schedule only helps when communications are followed and queues are monitored. Keep reserve capacity for early and late arrivals.
Three practical station layouts
Layout 1: printer at every lane
- Fast direct ownership of each job
- Easy fault isolation by lane
- High hardware and supply count
- Requires identical driver settings and stock discipline
Layout 2: two check-in lanes per printer
- Reduces printer quantity
- Needs clear job labelling and assembly handoff
- One printer failure affects more than one lane
- Can work for pre-printed collection plus occasional output
Layout 3: central print bank
- Technical team controls hardware and stock
- Supports industrial printers and larger supplies
- Requires job identification and physical badge routing
- Distance and batching can add delay
Standard operating procedure for a normal attendee
- Welcome attendee and scan or search the registration record.
- Confirm the displayed name and organisation.
- Mark check-in according to the registration system.
- Select or generate the approved badge output.
- Send the job to the assigned printer.
- Visually compare the printed name with the record.
- Scan the printed QR code when access depends on it.
- Insert or attach the badge.
- Hand it over with any orientation or lanyard guidance.
Standard operating procedure for an exception
- Move the attendee out of the normal queue.
- Identify whether the issue is spelling, registration status, transfer, badge type or duplicate.
- Obtain the required approval for access or ticket changes.
- Update the canonical data source.
- Regenerate only the affected badge.
- Mark the previous credential as superseded where relevant.
- Print, scan and hand over the replacement.
- Record the reprint reason and operator.
Data governance and privacy
- Export only the fields required for check-in and printing.
- Keep sensitive registration notes out of the badge file.
- Use role-based access to attendee data.
- Encrypt event laptops and use strong login controls.
- Define how offline exports are transferred and deleted.
- Prevent unauthorised USB storage when practical.
- Use random code tokens rather than personal data in QR codes.
- Destroy abandoned or misprinted badges containing personal details.
Accessibility at the registration desk
A fast queue is not automatically an accessible queue. Provide a lower counter or mobile check-in option, clear large-print signage, a hearing-friendly interaction path and alternatives to neck lanyards. Staff should know how to assist attendees who cannot use a self-service kiosk or hold a phone for scanning.
- Offer clips, magnetic holders or wrist alternatives where appropriate.
- Keep accessible routes free of cable covers and queue barriers.
- Do not require attendees to disclose medical information at a public desk.
- Allow a companion or staff member to assist with lookup.
- Make the badge name readable rather than overloading it with small content.
Signage and queue communication
Use signs before attendees reach the desk:
- Prepare your ticket or QR code
- Pre-registered attendees
- Speakers and VIPs
- Walk-ins and corrections
- Accessibility assistance
- Badge collection by surname or company where used
Good signage reduces conversations at the printer station and directs exceptions early.
Consumables forecasting
Forecast from expected output plus setup, training, walk-ins, reprints and contingency. For a roll printer, calculate badges per roll from the supplier’s count or usable length. For ink, run a realistic artwork sample because full-bleed colour consumes more than a simple name badge.
| Component | Forecast input | Contingency question |
|---|---|---|
| Badge stock | Attendees + walk-ins + reprints + tests | Can it be sourced locally? |
| Ink/toner/ribbon | Coverage and manufacturer yield | Is a replacement already onsite? |
| Holders | Attendees + damaged/incorrect items | Are holders reusable? |
| Lanyards | Attendees + staff + spare | Are alternative attachments available? |
| Printer cleaning items | Number of printers and stock changes | Are they manufacturer approved? |
| Cables/power | Every active and spare station | Is each cable labelled? |
Change control during event week
Designate one person who can approve template changes. Save each version with date and time. Changes to dimensions, code fields or role colours require a new physical proof. Do not let individual operators create local template variants during the live event.
Monitoring dashboard or manual board
Track active stations, queue length, average service time, stock remaining, printer faults and reprints. This can be a software dashboard or a simple operations board. The value is early intervention: open reserve capacity before attendees experience a long delay.
Venue handover questions
- When can equipment be delivered and secured?
- Which network ports and SSIDs are available?
- Are client isolation or captive portals enabled?
- Which power circuits serve the desk?
- Can cable covers and queue barriers be installed?
- Where can spare stock be stored?
- Who provides overnight security?
- What is the escalation contact during opening hours?
Go/no-go acceptance criteria
Do not open a print-on-demand lane unless:
- The printer completes a 50-badge test without drift.
- The longest names fit.
- All codes scan through the final holder.
- The spare device can replace the main unit quickly.
- The operator can load stock and clear a basic fault.
- The offline fallback is accessible.
- Supplies are counted and staged.
- The exception process is staffed.
Staff training agenda
Run a structured 60–90 minute session rather than handing staff a printer guide:
- Event badge categories and access rules
- Normal attendee procedure
- Exception-routing rules
- How to select the correct attendee and badge page
- How to identify a bad print
- How to replace stock
- How to swap a failed printer
- How to test a QR code
- Privacy and discarded-badge handling
- Timed practice scenarios
Only designated technical staff should alter driver settings, calibration or templates.
Shift and break planning
A station plan that requires every trained operator continuously for two hours has no resilience. Schedule breaks, floaters and handovers. Ensure at least two people understand each critical role. Record who holds administrator credentials and who can approve data or access changes.
Credential security
- Restrict access to blank staff, VIP and all-access stock.
- Track replacement credentials.
- Destroy superseded or misprinted access badges.
- Do not leave printed badge batches unattended in public areas.
- Keep administrator passwords away from normal operators.
- Use code tokens that can be revoked where the surrounding system allows.
- Separate identity verification from visual badge appearance.
Post-event metrics
| Metric | Why it matters | Next-event decision |
|---|---|---|
| Peak arrivals per minute | Validates capacity model | Change lanes or timed entry |
| Median/95th service time | Shows normal and difficult cases | Simplify flow or add exceptions |
| Printer faults by model | Reveals weak hardware or stock | Service, replace or standardise |
| Reprints by reason | Shows data and process quality | Improve registration form or proof |
| Unused personalised badges | Measures advance-print waste | Print later or use hybrid |
| Stock waste | Shows calibration/setup impact | Change stock, settings or training |
| Queue maximum | Attendee experience signal | Open reserve capacity earlier |
| Code scan failure rate | Credential quality | Increase code size or change holder |
| Holder return rate | Sustainability and cost | Improve collection process |
Opening-hour command structure
- Registration lead: owns queue and attendee policy.
- Technical lead: owns printers, laptops, network and settings.
- Data lead: owns attendee source, imports and corrections.
- Venue contact: owns power, network and physical infrastructure.
- Security/access lead: approves credential-level changes.
Publish one escalation channel. Operators should not contact several leads independently for the same issue.
Final rehearsal
Run the desk in its physical layout with real cables, signage, holders, lanyards and stock. Use at least 30 volunteers or simulated records in a short arrival burst. Introduce planned failures: disable one printer, remove internet, create a duplicate attendee and require a replacement badge. The team passes only when it recovers without losing control of the normal queue.
Opening checklist for the registration lead
- All stations staffed
- Control badges printed and scanned
- Correct attendee data version confirmed
- Normal and exception signage visible
- Accessible lane open
- Spare hardware powered
- Stock counts recorded
- Technical and venue contacts available
- Queue monitoring started
- Fallback authorisation understood
Frequently asked questions
How many badge printers do I need for a conference?
Estimate peak arrivals per minute, multiply by the complete service time in minutes and divide by a target utilisation below 100%. Then add spare capacity. Do not calculate printer count from total attendance alone.
Should onsite printers use Wi-Fi?
Wi-Fi can work, but USB or Ethernet is generally easier to isolate and diagnose. Test the venue network under realistic density and keep a direct-connect fallback.
Should all badges be printed onsite?
Usually not. A hybrid approach—pre-printing the stable majority and printing exceptions onsite—often reduces queue and hardware risk.
What data should be stored in the badge spreadsheet?
Use a unique attendee ID plus the visible name, organisation, role, badge type and a non-sensitive code token. Keep private operational notes out of the printed fields.
How much spare media should I bring?
Include setup and calibration waste, expected walk-ins, corrections, damaged stock and a contingency based on prior events. Also confirm whether replacement stock can be sourced locally.
Can BadgeFlow trigger a printer when someone checks in?
No. BadgeFlow creates customised print-ready PDFs. Automatic check-in-triggered printing requires another integrated registration or kiosk system.
What is the most important event-day backup?
A pre-configured spare printer and an offline attendee/PDF workflow are more valuable than an unopened spare device with no tested driver or media.
How do I prevent long badge-printing queues?
Reduce work in the normal lane, route exceptions separately, pre-print stable attendees, load-test the complete service cycle and open reserve capacity before the queue becomes critical.