
How to Print Badge Inserts for Conferences and Events
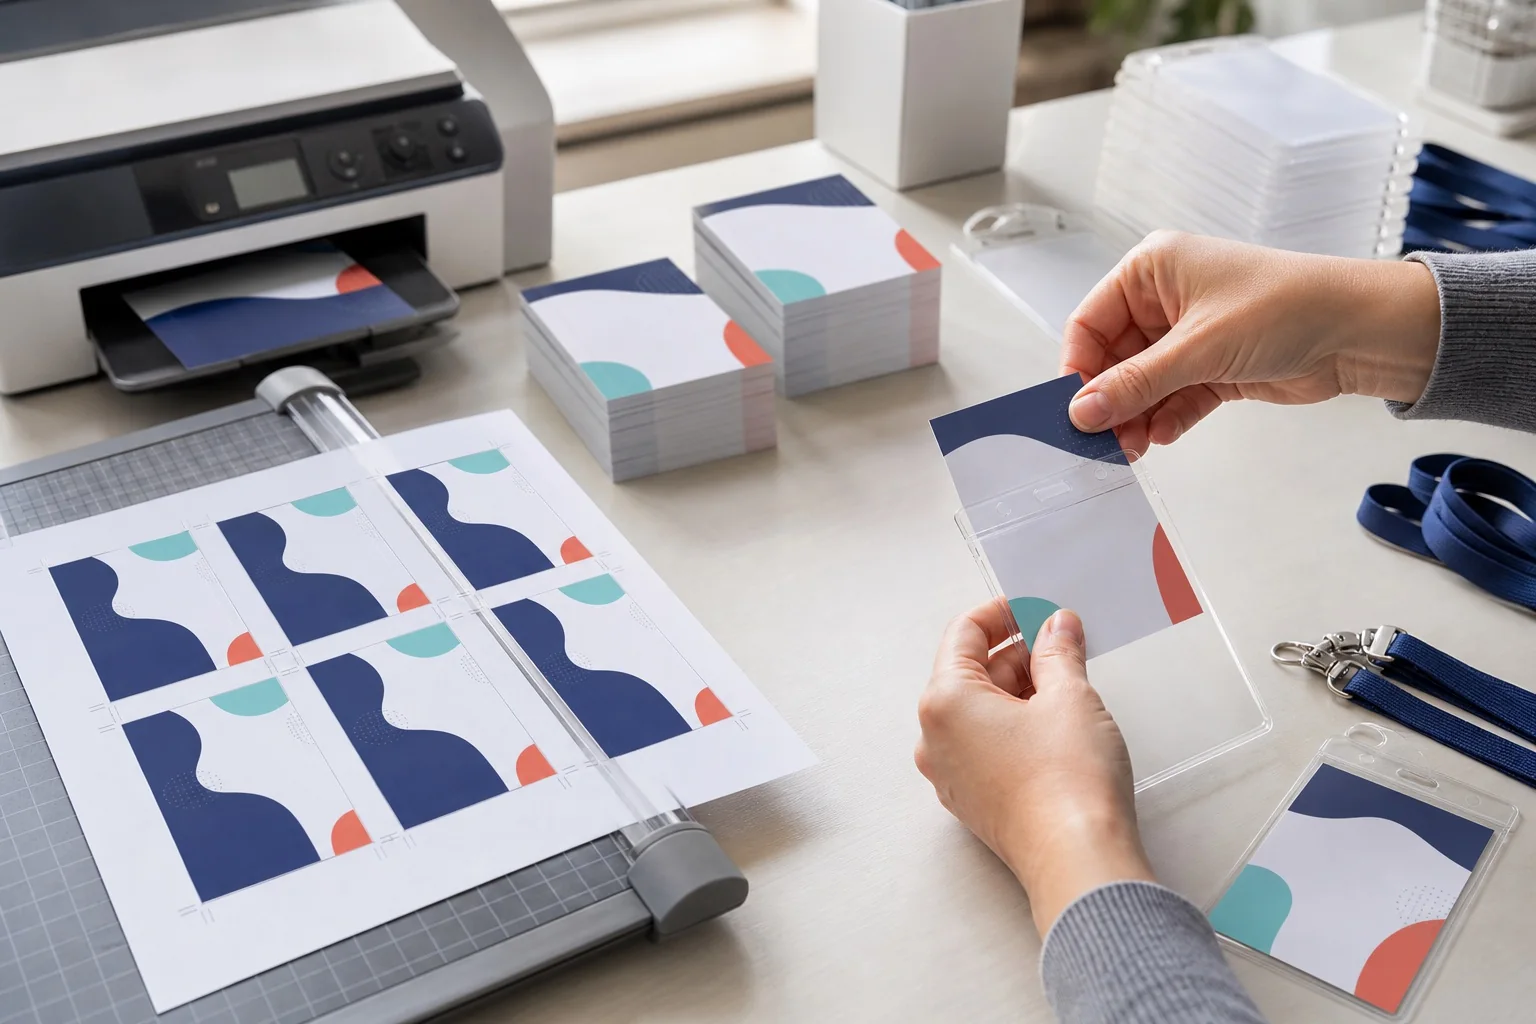
A badge insert is the printed paper or card placed inside a reusable holder. To print inserts correctly, design to the holder’s actual insert size, choose printer-compatible stock, preserve safe margins and print the PDF at 100% scale.
Understand the four measurements
| Measurement | Meaning | How it affects printing |
|---|---|---|
| Insert size | Finished paper or card placed inside | Use this for the BadgeFlow canvas |
| Internal pocket | Usable space inside the holder | Insert must slide in without bending |
| Visible window | Area unobstructed by seams and borders | Keep names and codes inside this safe area |
| External holder size | Complete plastic including attachment area | Relevant to comfort and packing, not print size |
Common conference badge insert sizes
| Format | Dimensions | Typical use | Design note |
|---|---|---|---|
| 4 × 3 in | 101.6 × 76.2 mm | Networking and general conferences | Enough for large name, organisation and compact code |
| 4 × 6 in | 101.6 × 152.4 mm | Large conference passes | Room for schedule, sponsor and larger QR |
| A6 | 105 × 148 mm | European portrait passes | Close to 4 × 6 but not identical |
| A7 | 74 × 105 mm | Compact event badge | Simplify content |
| CR80 | 85.60 × 53.98 mm | Rigid ID-card format | Limited area; usually plastic-card workflow |
| 90 × 60 mm | 90 × 60 mm | Common UK/EU holder family | Verify supplier’s visible window |
| Avery 5390-style | 3.5 × 2.25 in | Holder insert sheets | Match exact sheet grid and margins |
Use the conference badge dimensions table for conversions and the conference badge size guide for choosing a format.
Insert badge or adhesive badge?
| Badge type | Advantages | Disadvantages | Best for |
|---|---|---|---|
| Holder insert | Reusable holder, polished appearance, protects paper | Requires holder and insertion labour | Conferences, trade shows and multi-day events |
| Adhesive badge | Fast and inexpensive; no holder | Can damage clothing or detach; limited prestige | Visitors, meetups and short workshops |
| Rigid card | Durable and compact | Specialist printer and limited area | Staff and access IDs |
| Pre-branded shell | Premium fixed colour plus variable data | Second-stage alignment | Large branded events |
Choose paper or cardstock
The holder protects the insert, so extremely heavy stock can add feed problems without improving the attendee experience. Choose a material that stays flat, accepts toner or ink and slides into the holder.
| Stock | Advantages | Risks | Use |
|---|---|---|---|
| 80–100 gsm office paper | Cheap and easy to feed | Can curl or look flimsy | Emergency or double inserts |
| 120–170 gsm heavy paper | Better body; widely printable | Printer support varies | General conference inserts |
| 180–250 gsm cardstock | Professional rigidity | Can jam or crack in unsupported printers | Open holders or holder-free cards |
| Coated stock | Strong colour and surface | Toner/ink compatibility and glare | Premium branded inserts |
| Synthetic paper | Water and tear resistance | Higher cost and printer-specific handling | Outdoor or multi-day passes |
| Pre-cut insert sheets | Fast separation and consistent size | Exact alignment required | Known Avery-compatible formats |
Read what paper or cardstock works best for badge printing and follow the printer manufacturer’s media limits.
A4 versus US Letter layouts
A4 is 210 × 297 mm; US Letter is 8.5 × 11 inches (215.9 × 279.4 mm). They are not interchangeable. A layout designed for one can drift or clip on the other. Select the correct page format in BadgeFlow and the print dialog.
For plain stock, arrange as many inserts as fit while preserving trim space and printer margins. For pre-cut sheets, use the exact product grid from the Avery-compatible name badge template guide.
Bleed, safe area and crop marks
Bleed
Bleed extends background artwork beyond the trim edge. Office printers often cannot print edge to edge, so a full-bleed insert may require larger paper followed by trimming or professional production.
Safe area
Keep names, codes and role labels inside the holder’s visible window. Leave extra space near a top lanyard slot or welded seam.
Crop marks
Crop marks help cut plain sheets. Keep them outside the finished insert and ensure they do not appear on pre-cut stock.
Single-sided or double-sided inserts?
Lanyards rotate. If the attendee name must always be visible, repeat the essential identity on both sides. The reverse can contain a schedule, Wi-Fi details, emergency information or sponsor content, but do not place the only name on one side.
Duplex registration can shift from front to back. Test several sheets and measure alignment. For critical two-sided output, print the front and reverse as separate inserts placed back-to-back.
Prepare attendee data
Use one row per badge. Start with the name badges from Excel workflow or Google Forms and Google Sheets badge workflow. Suggested visible fields are:
first_name
last_name
organisation
job_title
badge_type
qr_token
Keep operational notes, dietary details and private data out of the design.
Step-by-step BadgeFlow insert workflow
- Obtain a physical holder sample.
- Measure the existing insert or supplier-specified insert dimensions.
- Measure the visible window and attachment obstructions.
- Choose portrait or landscape.
- Create an exact-size BadgeFlow badge.
- Import attendee data and map visible fields.
- Apply the hierarchy in how to design conference name badges.
- Add QR or barcode fields with a generous quiet zone.
- Choose the intended A4, Letter, custom or Avery-compatible output layout.
- Export the print-ready PDF.
- Open it in a desktop PDF viewer.
- Select the correct paper size and actual-size/100% scaling.
- Print one sheet on the real stock.
- Cut or separate one insert and place it in the holder.
- Check visible area, fit, readability, glare and scanning.
- Approve the physical proof before the full run.
Designing a readable insert
- Make the first name readable from conversational distance.
- Use the surname as a secondary but visible element.
- Shorten company and job-title fields rather than shrinking everything.
- Use a clear role band for STAFF, SPEAKER, VIP or EXHIBITOR.
- Reserve a stable code zone.
- Keep sponsor art from competing with the attendee identity.
- Preview the longest real names before export.
QR codes through holders
Plastic can create glare, curvature and reflections. Test codes while worn under venue lighting. Keep the code away from seams and edges. Matte inserts and a clean white code zone can improve reliability. Use the QR-code and barcode printing guide.
Pre-cut sheets versus plain sheets
| Method | Advantages | Risks | Best use |
|---|---|---|---|
| Pre-cut or micro-perforated sheets | Fast separation; consistent finished size | Alignment is unforgiving; product-specific | Recurring known holder formats |
| Plain paper/card sheets | Any custom size; lower stock dependency | Cutting labour and accuracy | Custom or low-volume badges |
| Commercially cut batch | Professional finish | Supplier deadline and shipping | Large stable conferences |
| Roll-fed inserts | One at a time and good for changes | Requires compatible non-adhesive/perforated media | Onsite dynamic production |
Sorting and loading inserts
- Print in surname order, company order or registration wave according to check-in.
- Separate staff, speaker, exhibitor and attendee batches.
- Label every print batch with version and quantity.
- Keep a physical approved sample with the assembly team.
- Use trays or boxes sized to avoid bending inserts.
- Track blanks and damaged inserts.
- For large production, use bulk badge printing from Excel.
How to reprint one insert
A correction should not block the normal queue. Options include selecting the affected PDF page, exporting a one-badge custom page on plain stock, reserving a partly used sheet with a documented position, or using a dedicated roll printer. Follow the instant reprints and walk-ins guide.
Common badge-insert printing problems
| Problem | Likely cause | Fix |
|---|---|---|
| Insert will not fit holder | Designed to external holder size | Use actual insert dimensions |
| Holder hides text | Visible window is smaller than insert | Move critical content into safe area |
| Output is too small | Fit-to-page scaling | Print at actual size |
| Sheet drifts down page | Incorrect margins or cumulative printer feed error | Use exact template and test multiple rows |
| Cardstock jams | Unsupported thickness or feed path | Use approved lighter stock or alternate printer |
| Front and back misalign | Duplex registration variation | Adjust or use two back-to-back inserts |
| QR code fails through holder | Glare, seam or curvature | Move code, use matte stock and retest |
| Cut lines remain visible | Crop marks inside trim | Move marks outside finished area |
| A4 layout clips on Letter | Wrong paper standard | Match PDF and printer paper size |
| One correction wastes sheet | No exception workflow | Use one-badge page or dedicated reprint stock |
Production checklist
- Physical holder sample approved
- Insert and visible-window measurements recorded
- Paper supported by printer
- Correct A4 or Letter layout
- Actual-size print setting documented
- Long-name proof printed
- QR/barcode scan tested through holder
- Front/back orientation tested
- Sorting order agreed
- Blank and reprint stock available
- Event-day process aligned with the conference check-in checklist
Calculate how many inserts fit on a sheet
Theoretical sheet capacity is not only sheet area divided by badge area. Include printer non-printable margins, gaps between inserts, crop marks and cutting tolerance. For pre-cut sheets, use the manufacturer’s fixed grid. For plain sheets, create a physical cutting test before optimising for one extra insert.
Example: 4 × 3-inch landscape inserts on US Letter
A US Letter sheet is 8.5 × 11 inches. Two 4-inch-wide inserts can fit across the 8.5-inch width with a narrow centre gap, and three 3-inch rows can fit within 11 inches with margins and gaps if the printer supports the layout. The exact grid must account for non-printable edges.
Example: A7 inserts on A4
A7 is 74 × 105 mm and A4 is 210 × 297 mm. The ISO relationship makes structured grids possible, but printer margins, crop marks and separation method still determine the usable layout.
Cutting methods
| Method | Advantages | Risks | Best volume |
|---|---|---|---|
| Guillotine cutter | Fast straight batch cuts | Requires alignment and safe operation | Medium/large plain-sheet batches |
| Rotary trimmer | Controlled and accessible | Slower for high volume | Small/medium batches |
| Scissors | No specialist tool | Slow and inconsistent | Emergency only |
| Micro-perforated sheet | No cutting equipment | Edge finish and exact template dependency | Recurring standard stock |
| Commercial die cut | Professional and consistent | Supplier cost and deadline | Large stable runs |
Stack only the number of sheets the cutter is rated to handle. Cut a controlled sample first and measure the finished insert.
Duplex alignment strategies
Automatic duplex
Print a calibration grid and measure horizontal and vertical shift. Adjust the reverse design within the safe area rather than placing critical content at the edges.
Manual flip
Record the tray orientation with a labelled test sheet. Manual flipping is error-prone when operators change printers or paper paths.
Back-to-back inserts
Print two single-sided cards and place them together. This adds material but avoids duplex registration and lets each side use a different stock or print process.
Holder assembly workflow
- Separate inserts into labelled attendee categories.
- Inspect finished dimensions and print quality.
- Place front and reverse inserts in the correct orientation.
- Load the holder without bending corners.
- Attach lanyard or clip.
- Check that the slot and seam do not obscure content.
- Sort the assembled badge according to the registration plan.
- Count completed and rejected badges.
Assembly labour can exceed print time. Time a 50-badge sample and include that work in the production schedule.
Accessibility and wearer comfort
- Use a name size readable at conversational distance.
- Offer clips or alternative attachments where possible.
- Use breakaway lanyards when required by venue policy.
- Avoid excessive badge weight.
- Check that a wide landscape holder does not rotate constantly.
- Do not require a pin attachment that damages clothing.
- Provide an alternative for people who cannot wear a neck lanyard.
Sustainable insert workflow
Reusable holders with replaceable paper inserts can reduce repeated accessory purchases when the event successfully collects, cleans and stores them. Record the actual return rate. Avoid laminating a paper insert unless durability requires it, because mixed materials may be harder to process.
- Use recycled or certified stock where it meets printer and quality requirements.
- Minimise unused personalised badges by printing close to the event.
- Separate paper inserts from holders after collection.
- Provide clearly labelled return points.
- Store holders flat to prevent damage.
- Record damaged and missing units.
Scenario: 100-person workshop
Print 4 × 3 inserts on office sheets, use reusable holders and keep one plain sheet for replacements. Cutting and insertion can be completed internally. A pre-cut Avery-compatible format can remove cutting when the exact holder matches.
Scenario: 1,000-person conference
Use controlled print batches, a guillotine or micro-perforated stock, labelled assembly teams and an exception print process. Freeze each batch by attendee type and surname range. Keep blank stock identical to the advance run.
Scenario: 5,000-person trade show
Consider professional cutting or pre-cut stock, formal proof approval and multiple assembly workstations. Track exhibitor group orders and replacements separately. A hybrid pre-branded shell can reduce onsite colour requirements.
Sending insert files to a print shop
- Provide finished dimensions, bleed and safe area.
- Confirm page sequence and whether the shop imposes the file.
- Supply fonts or export them correctly in the PDF without distributing restricted font files.
- Define colour expectations and request a physical proof.
- Confirm stock, grain direction, coating and finished thickness.
- Specify cutting, sorting, boxing and label order.
- Provide a data-protection and deletion requirement for attendee files.
- Keep a local fallback PDF for late changes.
Insert preflight checklist
- Correct insert dimensions
- Correct sheet size
- One H1 is irrelevant to print—but one approved template version is essential
- Safe area matches visible window
- Long names and missing fields tested
- Codes scan through holder
- Crop marks and bleed correct
- Duplex orientation correct
- Stock feeds reliably
- Finished card slides into holder
- Assembly time measured
- Reprint path documented
Badge insert workflow: mail merge versus BadgeFlow
| Task | Traditional mail merge | BadgeFlow workflow |
|---|---|---|
| Data source | Excel connected to Word/Docs | Excel, CSV or Google Sheets data imported/mapped |
| Badge layout | Label grid or document table | Badge-focused canvas and templates |
| Custom dimensions | Possible but manual | Standard or custom badge size |
| QR/barcode | Often complex field/image workflow | Dynamic code fields |
| Long-name preview | Merged-document inspection | Preview attendee data in badge design |
| Output | Merged document/PDF | Print-ready PDF |
| Late changes | Repeat merge and verify | Update/import data and regenerate |
Mail merge can be adequate for a stable, simple insert sheet. A badge-specific tool is useful when dimensions, code fields, branding and repeated changes increase complexity. See the mail merge versus online badge generator comparison.
Sheet alignment diagnostic
If the top row aligns but lower rows drift, the problem is usually cumulative pitch or scaling rather than a constant margin offset. Measure the vertical distance between the first and last badge. Verify:
- PDF paper size
- 100% scaling
- Row pitch in the template
- Printer feed accuracy
- Correct sheet product
- Whether the printer driver adds margins
If every row is shifted by the same amount, adjust the whole layout or printer offset only after confirming scale.
Quality-control sampling
- Check the first sheet after setup.
- Check a sheet from the middle of each batch.
- Check after every paper or toner change.
- Measure cut dimensions.
- Fit random inserts into holders.
- Scan random codes.
- Count the batch against the attendee range.
- Record rejected sheets and cause.
Safe-area example
Suppose a 101.6 × 76.2 mm insert has a visible window of 98 × 72 mm. Design critical content inside the 98 × 72 mm area and leave an additional buffer around the QR code. Background colour can extend to the insert edge when the print/cut method supports it, but the name should not.
Print-shop proof checklist
- Finished dimensions and tolerance
- Stock name, weight and finish
- Colour proof
- Code scan test
- Holder fit
- Front/reverse orientation
- Cut and perforation quality
- Sort order and box labels
- Replacement deadline
- Attendee-data deletion confirmation
Final insert production timeline
- Six weeks: order holders and stock samples.
- Four weeks: approve dimensions and design.
- Three weeks: print long-name and code proof.
- Two weeks: prepare main attendee batch.
- One week: print, cut and assemble stable records.
- One day: produce late-change batch and stage reprint stock.
- Event day: operate a separate exception process.
Frequently asked questions
What size should a conference badge insert be?
It must match the holder’s specified insert size, not the outside plastic dimensions. Common formats include 4 × 3 inches, 4 × 6 inches, A6, A7 and 90 × 60 mm.
What paper weight is best for badge inserts?
A medium or heavy paper/cardstock that your printer supports is usually appropriate. The holder provides protection, so maximum thickness is not always necessary. Test feed and fit.
Should badge inserts be printed double-sided?
Repeat the attendee name or essential identity on both sides when the holder can rotate. Use the reverse for schedules or sponsor content only if the primary identity remains visible.
How do I stop inserts printing at the wrong size?
Use a PDF with the correct page or sheet dimensions and print at actual size or 100%. Disable fit-to-page and measure one physical proof.
Can I print inserts on Avery-compatible sheets?
Yes, when the exact BadgeFlow sheet layout matches the product dimensions and margins. Always test one sheet before the full batch.
Do QR codes scan through plastic badge holders?
They can, but glare, curvature and seams may interfere. Test the final assembled badge under venue lighting.
How do I reprint one insert without wasting a full sheet?
Use a custom one-badge page on plain stock, select the relevant PDF page, or maintain a dedicated roll/exception printer. The best method depends on your normal stock.
Can BadgeFlow create custom badge insert sizes?
Yes. Set any standard or custom badge dimensions, import attendee data and export a print-ready PDF.