
Printable Summer Camp Name Tags from a Roster
To make printable summer camp name tags, prepare one roster row per wearer, select the name and group fields that should be visible, and import the production list into BadgeFlow. Build a clear camper or counselor layout, choose the matching paper format, and export a printable PDF. Keep the public tag focused on recognition while the camp’s full administrative roster stays separate.
These are name tags for activities and events. Clothing labels, luggage tags, pickup authorization, and access-control systems have different requirements. Decide what the tag is meant to do before choosing its fields or materials.
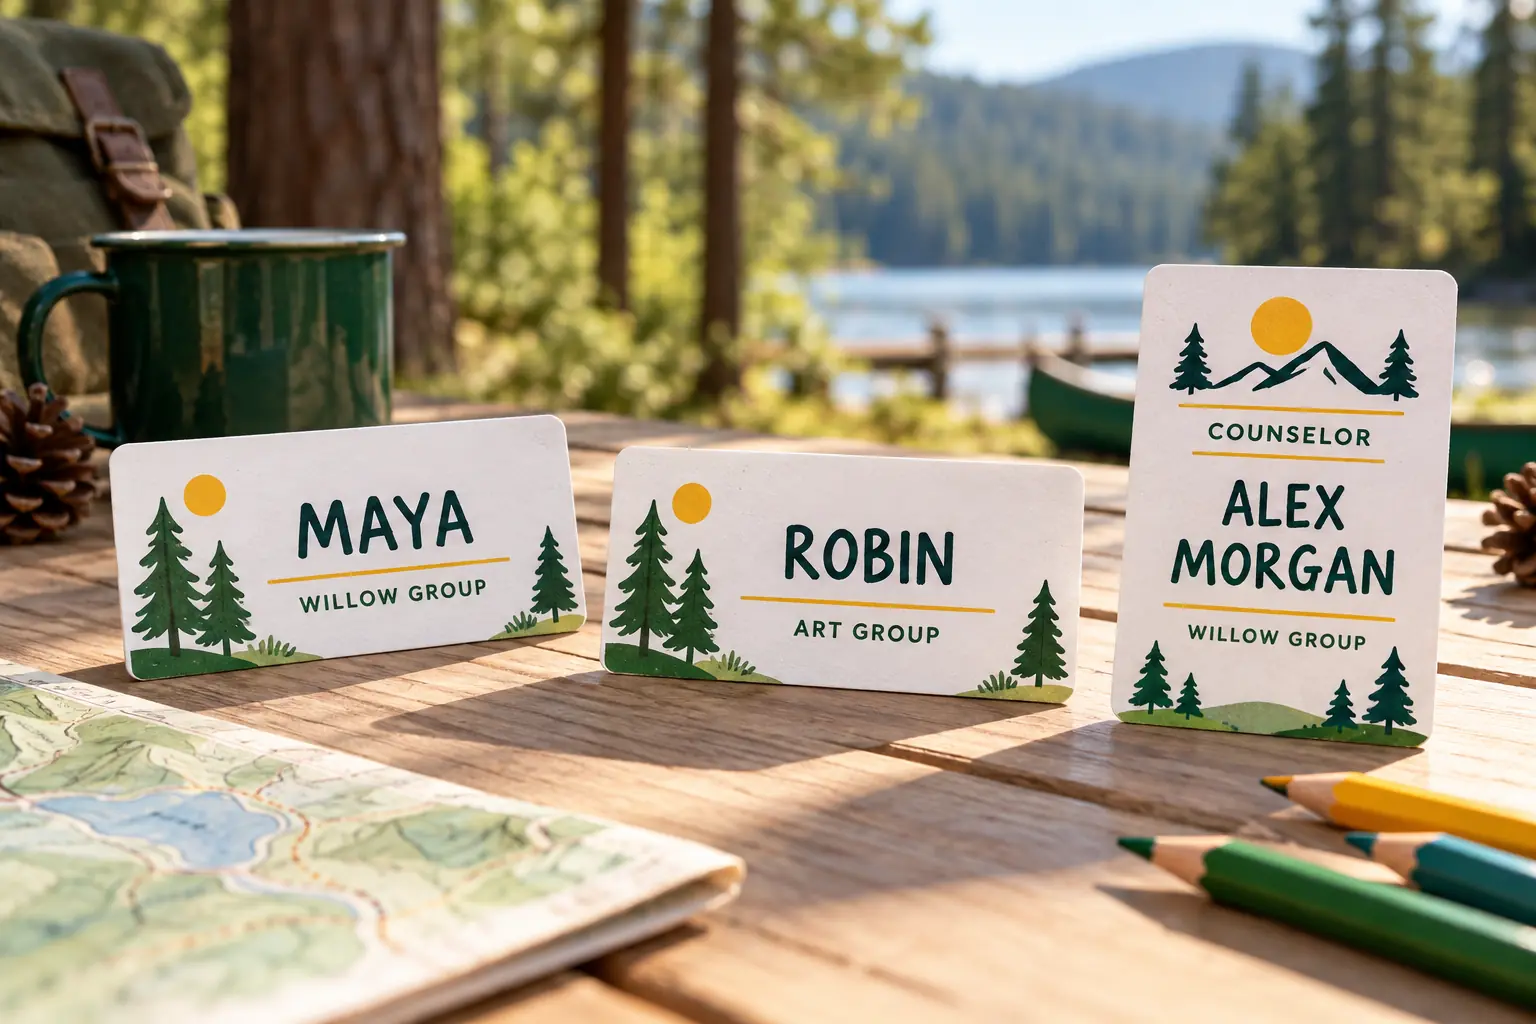
Choose the job each tag will perform
A camper tag can help people learn names and find an activity group. A counselor badge can help participants identify an adult’s role. A session tag can help the team distinguish the correct day or activity.
One design does not have to carry every piece of information. For example, a camper moving between several activities may benefit from a stable group label more than a long schedule printed in tiny type. A counselor may need a prominent role label instead of an activity name.
- Camper identification: display name and a useful group label.
- Staff recognition: name and a clearly printed counselor or staff role.
- Session organization: name, group, and a concise day or activity identifier.
Use the camp’s existing registration and supervision procedures to decide who receives which tag. A printed role or QR code does not independently verify identity or authorize collection of a child.
Four camp name-tag layouts to recreate
These are original layout recipes rather than supplied downloadable files or named built-in BadgeFlow templates. Recreate them using a suitable layout, and select the actual finished size around your materials and activity plan.
1. First-name camper badge
Use a landscape 4 × 3-inch design with a large display name and a short group label beneath it. A small camp title can sit above the name. Keep any decorative illustration away from the text.
Maya
Willow Group
Choose the display-name convention through the camp’s normal policy. If several participants share a first name, resolve that deliberately rather than letting the printing operator guess which extra identifying details should be visible.
2. Cabin or activity-group badge
Place the name in the upper half and give the group label a clear supporting band. A 4 × 3-inch insert offers a practical starting area; use a different size if it better matches the actual stock and attachment.
Robin
Art Studio Group
A color may reinforce the group, but include its name in text. Test the printed contrast and make sure the distinction still works when a sheet is printed in monochrome.
3. Counselor badge
Keep the main name readable and add a prominent COUNSELOR or approved staff-role label. A portrait or landscape layout can work; choose the orientation around the holder and the amount of text.
COUNSELOR
Alex Morgan
Willow Group
Use the role wording your camp already recognizes. Consistent labeling is more useful than several creative variations that participants have to interpret.
4. Session or day badge
For a program where the displayed session changes, use separate fields for the name, group, and session. Keep the session prominent enough for organizers without letting it overwhelm the name.
Sam
Maple Group
Wednesday — Creative Lab
Plan how session changes will be handled before printing. A badge containing yesterday’s activity can be confusing even when the wearer’s name is correct. A stable group badge may be simpler if participants rotate frequently.
| Recipe | Main field | Supporting field | Production consideration |
|---|---|---|---|
| First-name camper | Display name | Group | Resolve matching names through camp policy |
| Activity group | Display name | Written group label | Do not rely on color alone |
| Counselor | Name and role | Assigned group | Use consistent role wording |
| Session/day | Display name | Session and group | Keep changed assignments current |
Create a minimal production roster
Make a production copy of the roster containing only the fields needed to create and reconcile the name tags. Keep medical information, contact details, and pickup instructions in the camp’s separate authorized systems.
Use one row per tag wearer. If the source file has one family per row, expand it into individual rows before importing. Check the resulting count against the approved roster, including counselors and other staff if they are part of the batch.
| Display name | Group | Role | Session |
|---|---|---|---|
| Maya | Willow | Camper | Creative Lab |
| José | Oak | Camper | Nature Workshop |
| Alex Morgan | Willow | Counselor | Creative Lab |
| Robin | Art Studio | Camper | Morning |
| Sam | Maple | Camper | Creative Lab |
Keep each field separate so you can change what appears on the tag without rewriting the whole record. For a simple camper design, Role and Session might stay out of the visible layout. For a counselor badge, Role becomes essential.
Review spelling and group assignments before designing. A visually polished batch cannot compensate for a stale roster. Choose a clear owner for updates and use a filename that records the event/session and production version.
Build the tags in BadgeFlow
- Import the approved Excel or CSV production roster.
- Choose an available layout or recreate one of the four recipes.
- Set the finished dimensions to match the intended materials.
- Map the display name, group, and any required role or session fields.
- Preview names with accents, long labels, and any missing optional values.
- Select the paper size and badge arrangement, then export the PDF.
Follow the Excel badge workflow for general import steps. The printable template guide provides further layout ideas.
Start with one neutral design and a written group field if you want a straightforward production process. If groups need distinct backgrounds, plan separately prepared batches or another verified editor workflow. A spreadsheet column does not automatically establish conditional color changes.
Keep name placement and margins consistent across the variations. Compare the combined count of all group batches with the approved total so no group is missed or produced twice.
Choose stock for the actual activity
Short indoor use and outdoor handling place different demands on a printed tag. Ordinary paper may be adequate inside an appropriate holder for one activity, while another setting may require a more protective format. Check the supplier’s stated properties rather than assuming that a thicker sheet is waterproof or tear-resistant.
Confirm the printer’s supported media size, weight, coating, and feed path. Adhesive sheets and heavy stock may require different settings or may not be supported by the device you intend to use. The paper and cardstock guide explains those decisions.
Attachment choices should follow the camp’s established policies for participant age and activity. Keep the name-tag design compatible with that choice, including areas that a holder seam, clip, or other attachment may cover.
Print a proof and organize distribution
Print a plain-paper proof at Actual size or 100% scaling when the PDF matches the intended stock. Check every badge position, not just the first. US Letter, A4, and different multi-badge products have different geometry.
Use the multi-badge sheet guide and Avery-compatible layout guide to match the output to the physical product.
Check a finished sample under typical activity lighting. Can staff read the name and group without holding it close? Does the role remain obvious when printed in monochrome? Is important text obscured after assembly?
Label completed batches by session or group and count them after separation. Keep a small supply of contingency tags and a clear route for correcting names or changed group assignments. Remove superseded tags when replacements are issued.
Troubleshooting camp name-tag batches
| Issue | Action |
|---|---|
| Wrong group on a tag | Check the current approved roster and export version. |
| Name too small | Remove optional content or revise the layout before shrinking all names. |
| Missing tags | Count individuals, including people within family bookings. |
| Groups only differ by color | Add a readable written group label. |
| Print positions drift | Match the exact stock layout and disable unintended scaling. |
| Stock fails during use | Reassess material and attachment suitability for the actual activity. |
Frequently asked questions
What should a camp name tag show?
Use the approved display name and useful group information. Add staff roles or session labels when they serve a clear purpose.
Can I print camp name tags from Excel?
Yes. Prepare one wearer per row, map the intended fields, and generate a PDF in the correct paper layout.
How can counselors stand out?
Use a consistent written role label, a clear name, and an optional distinctive accent. Keep the meaning understandable without color.
Can every group have its own color?
Plan supported design variations or separate batches. Keep written group labels and check the total across all batches.
What stock should I buy?
Choose stock supported by the printer and appropriate to the activity and attachment. Verify the actual product specifications before buying in bulk.
Can I reprint a changed name or group?
Correct the approved data, generate the required replacement, and remove the superseded tag from circulation.