
Class Reunion Name Tag Templates and Printing Guide
The most useful class reunion name tag templates make a preferred name easy to read, add an optional name used at school, and show the graduation year without crowding the layout. Start with your guest list, choose a consistent design, and generate personalized badges as a printable PDF. Photos can be a helpful addition, but a clear name-only design should work for everyone.
Unlike a conference badge, a reunion badge often has to connect two versions of someone’s identity: the name classmates remember and the name the person uses today. It also needs to welcome partners and other guests who did not attend the school. The layout recipes below account for those differences.
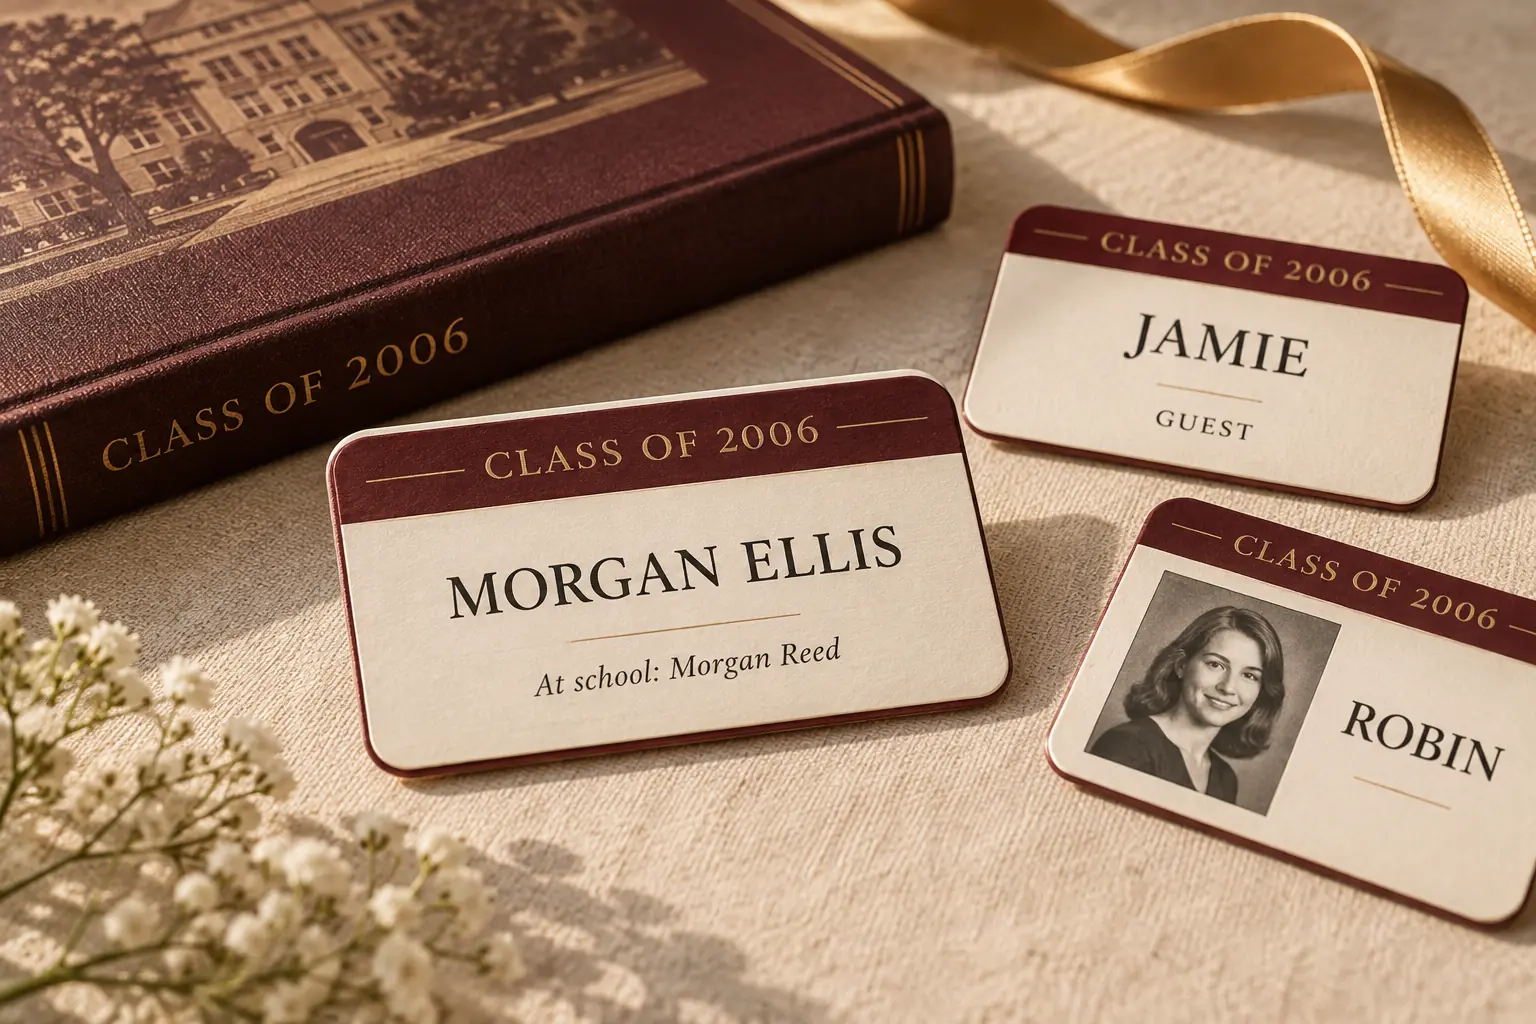
What should go on a class reunion name tag?
Ask attendees what they want printed. Use a preferred-name field as the main label, with an optional “At school” line for a former surname or familiar nickname. Avoid automatically labeling that field “maiden name”; names change for many reasons.
- Preferred printed name: the largest and clearest element.
- Name used at school: optional supporting context.
- School and graduation year: useful for identification, especially when several classes attend.
- Guest relationship: a short optional line such as “Guest of Morgan.”
- Photo: optional, with a text-only alternative.
Keep graduation year separate from event year. “Class of 2006” tells classmates where someone fits; “Reunion 2026” identifies the occasion. An anniversary number can appear in a small header, but it should not compete with the person’s name.
Six reunion badge layouts to recreate
These are original layout recipes you can build in a badge editor. They are not presented as downloadable files or as named templates already installed in BadgeFlow. Dimensions are design starting points; match the final size to your purchased stock and holder.
1. Classic school-color insert
Use a landscape 4 × 3-inch layout with a shallow school-color header. Place the preferred name in the center, the optional school name below it, and the graduation year in a small footer. Keep the background behind the name light and plain.
RIVERSIDE HIGH REUNION
Morgan Ellis
At school: Morgan Reed
Class of 2006
This works well when most classmates want a simple, recognizable badge. Use a permitted school logo only if it remains clear at its printed size.
2. Then-and-now photo layout
A portrait 4 × 6-inch layout gives photographs room without reducing the name to a caption. Reserve two equal image areas for “Then” and “Now,” followed by the preferred name and class year. If only one picture is available, use one image area rather than leaving a conspicuous empty box.
Build this version only after confirming how you will place each person’s photographs in the final design. The image workflow matters as much as the layout when you have many attendees.
3. Minimal large-name adhesive tag
Choose clothing-compatible adhesive badge stock and use its exact printable dimensions. Print a large name and a small class year with little decoration. This is a practical option for a short indoor gathering where attendees do not need holders.
Check the stock maker’s fabric guidance. A label being printable does not make its adhesive appropriate for every garment.
4. Alumni and guest layout
Keep the same name hierarchy for everyone. An alumnus might have “Class of 1996,” while a guest has an optional “Guest of Jamie.” Avoid shrinking guest names or giving them an obviously inferior design.
A shared 4 × 3-inch landscape format makes the two versions look like part of one event. A plain “Guest” label is enough when a relationship line is unwanted.
5. Multi-class reunion layout
Give the class year a consistent, visible position, such as the lower-right corner of a 4 × 3-inch insert. You may reinforce class groups with accent colors, but print the year as text so the distinction survives monochrome printing and different color perception.
Do not put class years in the same data field as attendee names. Separate fields make the hierarchy easier to control.
6. Large-print reunion badge
Use a roomy landscape 4 × 3-inch or larger holder-compatible layout with a strong name and one supporting line. Drop the photograph, decorative crest, or anniversary slogan if necessary. Test the longest preferred name before choosing the final type size.
This can be the default for the whole event rather than a special version that someone has to request.
| Layout | Best use | Core fields | Main check |
|---|---|---|---|
| School-color insert | General alumni gathering | Name, optional school name, class year | Logo does not dominate |
| Then-and-now photo | Photo-focused reunion | Name, class year, approved images | Verified per-person image workflow |
| Minimal adhesive | Short informal event | Name, class year | Stock and fabric suitability |
| Alumni and guest | Events welcoming partners | Name, class year or guest label | Equally readable guest names |
| Multi-class | Several graduating classes | Name, clearly printed year | Groups distinguishable without color |
| Large-print | Maximum name readability | Name, one supporting line | Longest record still fits |
Prepare the reunion guest list
Create one row for each person, including guests. A booking for two people should normally produce two badge rows. The following fictional example keeps the display fields separate:
| Preferred name | School name, optional | Graduation year | Guest of | Type | Photo reference |
|---|---|---|---|---|---|
| Morgan Ellis | Morgan Reed | 2006 | Alumni | Photo supplied | |
| Jamie Chen | 2006 | Alumni | |||
| Robin Chen | Jamie | Guest | |||
| José Rivera | 1996 | Alumni | Photo supplied | ||
| Alexandra Williams | Alex Williams | 2006 | Alumni | ||
| Sam Patel | 2016 | Alumni |
“Photo reference” is an organizer’s tracking field, not a claim that those words will import an image. Keep email addresses, payments, and other administrative details out of the printed design. Confirm ambiguous names with the attendee rather than silently choosing between versions.
How to approach class reunion name tags with pictures
Use photos supplied or approved for this purpose. A sharply cropped face will generally be easier to recognize than a full yearbook page reduced to a tiny rectangle. Keep the framing consistent and allow attendees to choose a name-only badge.
Before committing to a photo batch, make a complete sample with your chosen editor’s image controls. Check whether each image can be associated with the correct person and how much manual work that requires. Adding the same school logo to every badge is a different task from adding a different photograph to every badge.
For BadgeFlow, confirm the current attendee-specific image process before building a large photo workflow. This guide does not assume an image-URL column, automatic photo matching, or public image hosting. You can still produce the entire reunion as a consistent name-only batch.
Create the badges from your spreadsheet
- Review the guest list and agree on the final display fields.
- Import the list into BadgeFlow and choose a suitable available layout or recreate one of these recipes.
- Map the preferred name and supporting fields to the design.
- Add permitted school branding, leaving enough space around long names.
- Preview alumni, guests, different class years, and blank optional fields.
- Select a paper layout that matches the stock, then export the PDF.
The Excel badge tutorial covers spreadsheet production, while the logo placement guide explains how to preserve clear name hierarchy.
Print and organize the finished tags
Start with a plain-paper proof at Actual size or 100%. Check every position on the sheet against the actual stock. Use the Avery-compatible format guide for stock selection and the multiple-name-tags-per-page guide for sheet setup.
Decide how volunteers will find badges. Sorting by the surname used during registration may be easier than sorting by a former surname printed as supporting context. Keep an attendee lookup list at the desk and a small supply of blank or generic guest tags for exceptions.
Count physical badges after cutting or separating them. Check guest badges separately: those are easy to overlook when the original registration list contains one row per alumni booking.
Frequently asked questions
Should reunion name tags show former names?
Only when the attendee wants that context included. An optional “Name used at school” field is clearer and more inclusive than assuming a particular reason for a name change.
Do guests need a separate design?
No. Keep the same main design and replace the class-year line with a guest label or an optional connection to the alumnus.
What size works best?
A 4 × 3-inch insert is one practical starting point for name-led layouts. Photo-heavy designs may need more space. Choose the actual size around your holder and stock.
Can I include yearbook photos?
Use images you are permitted to use and confirm the per-person image workflow before promising photo badges to everyone.
How do I print different names on one sheet?
Use one attendee per data row and select the matching multi-badge paper layout when generating the PDF.
Are these ready-made downloads?
They are design recipes to recreate. You can adapt an available BadgeFlow layout or build your own using the fields described above.