
Printable lanyard badge templates for events
A printable lanyard badge must be designed for the holder's maximum insert size and visible window—not the holder's outside dimensions. Keep names, logos, and scannable codes away from seams, slots, and clips, then test the printed insert inside the exact holder before producing the full batch.
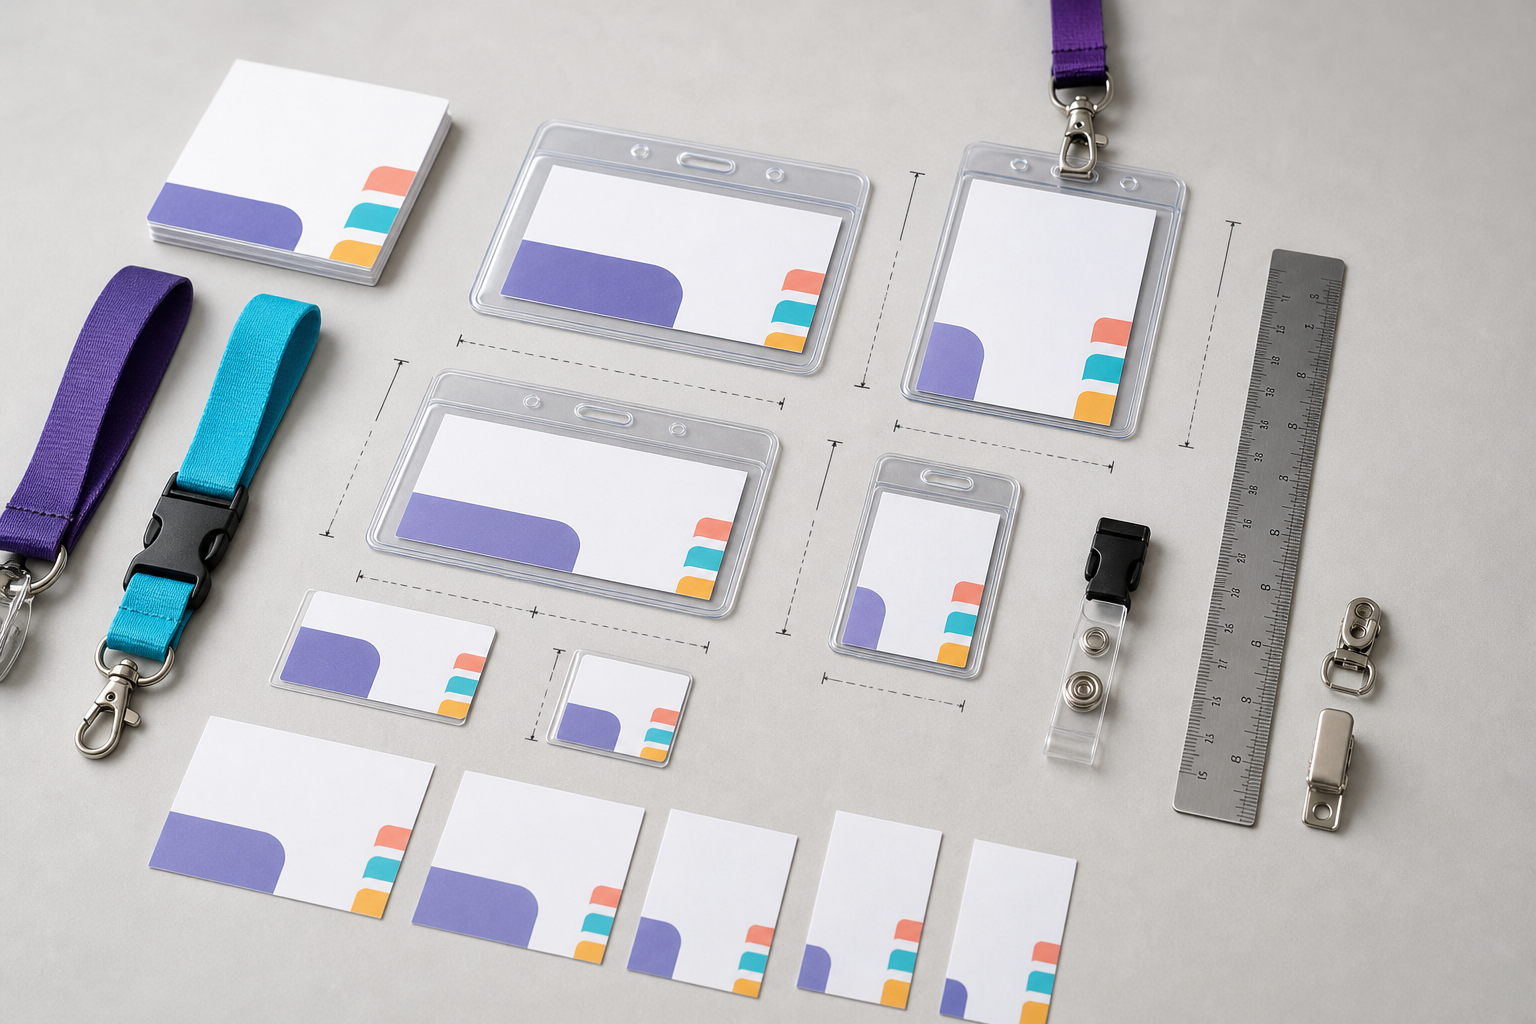
Know the parts of a lanyard badge
| Part | What it means for the design |
|---|---|
| Lanyard | The neck strap; its clip or hook connects to the holder. |
| Badge holder | The plastic or reusable outer product, including seams and attachment points. |
| Insert | The paper or card piece you actually print. |
| Visible window | The area not hidden by the holder border, seam, or slot. |
| Slot or punch | The attachment area that can cover or damage content. |
| Safe area | The region where essential text and codes remain clear of edges and hardware. |
Supplier descriptions are not always consistent. A product advertised as 4×6 or A6 may refer to the insert, pocket, visible area, or outer holder. Use the badge holder size guide to verify the measurements.
How to create a lanyard badge template
- Identify the holder. Record the maximum insert dimensions, pocket opening, visible window, orientation, seam width, and clip/slot location.
- Choose the finished insert size. Use the real supplier measurement rather than the holder's marketing name.
- Create a safe area. Keep names, codes, and important logos away from edges and attachment points.
- Choose the information hierarchy. Name first, organization second, role/type third, then code and branding where required.
- Prepare attendee data. Use one spreadsheet row per insert and separate fields for name, company, title, type, and code.
- Choose paper and sheet layout. Confirm A4, Letter, roll, or custom media and how inserts will be separated.
- Generate and physically test. Cut or separate one sample, place it in the holder, wear it, and scan any code.
Common lanyard badge sizes
| Format | Useful starting point | Watch for |
|---|---|---|
| 4×3 in | Compact name, company, and role badge | Landscape/portrait mismatch and holder window |
| 4×6 in | Conference pass with role, code, and branding | Weight, flipping, and clip coverage |
| A7 | Compact metric event insert | Actual pocket may be smaller than A7 |
| A6 | Larger UK/EU conference pass | Supplier may use “A6” loosely |
| Custom | Existing proprietary holder or specialty media | Printer printable area and cutting method |
There is no universal lanyard badge size. Compare formats in the conference badge size guide and exact conversions in the badge dimensions guide.
Portrait or landscape?
| Orientation | Advantages | Potential problem |
|---|---|---|
| Portrait | Natural zones for logo, name, role, code, and sponsor area | Can swing or flip; clip sits above the name |
| Landscape | Good for long names and company lines; compact at chest level | Less vertical room for several operational sections |
Do not choose orientation from appearance alone. Start with the holder you already own and the information the event actually needs.
Five lanyard badge layout patterns
Simple networking insert
Large name, company, and optional title. Use a compact holder and keep the event logo small.
Full conference pass
Separate zones for event identity, attendee name, organization, role, and code. Use 4×6 or A6 only when the content warrants it.
Staff or organizer credential
Add a large printed STAFF or ORGANIZER label, optionally with team/responsibility. Do not use the visual label as the only access control.
Exhibitor pass
Include name, company, EXHIBITOR label, and booth number where useful.
QR-enabled badge
Reserve a flat, unobstructed code zone with sufficient clear space. Test the final badge through the holder material.
QR codes inside plastic holders
Plastic glare, curves, seams, and swinging lanyards can make a code harder to scan. Keep the code away from the bottom corner where the holder bends, use dark code modules on a light background, and test under venue-like lighting with the intended devices. Follow the QR and barcode badge guide.
Choose paper or cardstock for the insert
The insert needs enough stiffness to sit flat but must still pass through the printer and slide into the pocket. Check the printer's supported media weight, grain direction, coating, and feed path. Heavy card can jam a desktop printer, while thin paper may curl or move inside the holder.
Read the badge paper and cardstock guide before buying production quantities.
Print several lanyard inserts per sheet
Set the finished insert size separately from the A4 or US Letter paper. Account for paper margins, crop marks, cutting gaps, and printer non-printable edges. Do not use A4 and Letter interchangeably. BadgeFlow can place personalized attendee records into the next available sheet position and create a PDF for the selected paper.
For cutting, sheet layout, and holder assembly, use the dedicated guide to printing badge inserts.
Physical test checklist
- The insert slides into the holder without bending.
- No essential content sits behind a seam or border.
- The clip does not cover the attendee name.
- The badge hangs in the intended orientation.
- Names remain readable at networking distance.
- Codes scan through the assembled holder.
- The sheet prints at 100% without cropping.
Create lanyard badge inserts from a spreadsheet
Choose the holder's real insert size, map attendee fields, and export a printable A4, Letter, or custom-size PDF.
Frequently asked questions
What size should a lanyard badge be?
Use the holder's verified maximum insert dimensions. Common event formats include 4×3, 4×6, A7, and A6, but none is universal.
Is holder size the same as insert size?
Not necessarily. The holder's outside size, internal pocket, visible window, and maximum insert can all differ.
Should a lanyard badge be portrait or landscape?
Use the orientation supported by the holder and best suited to the content. Portrait provides vertical zones; landscape works well for long names and compact data.
How do I stop the clip covering the name?
Measure the attachment area and keep a safe zone below it. Test the assembled badge at chest height.
What paper works for lanyard inserts?
Use paper or cardstock stiff enough to sit flat and within the printer's supported media range. Test insertion and handling.
Can I add a QR code inside a plastic holder?
Yes, but test glare, curve, code size, clear space, and the intended scanner after the badge is assembled.