How to Print Name Badges from Bizzabo
If you’re running a Bizzabo event and you need Bizzabo name badges today, you don’t want to wrestle with Word mail merge or spend your morning nudging text boxes. The reliable workflow is:
- Export Bizzabo attendees/registrants to CSV or Excel
- Import the exported file into BadgeFlow
- Generate a print-ready name badges PDF and hit Print
What you’ll need
- Your Bizzabo event (with registrations already in)
- A CSV/Excel export of attendees/registrants/contacts from Bizzabo
- BadgeFlow open in your browser: badgeflow.app
- Paper stock you plan to print on (A4/Letter sheets, badge sheets, or badge-printer stock)
Step 1 — Export your Bizzabo attendee list (CSV or Excel)
Bizzabo is powerful (translation: there are multiple ways your “people data” can exist). For badges, you want a file that’s closest to one badge per person (or per ticket/registration).
Option A (recommended): Export registrants/attendees from Bizzabo Reports
- Open your event in Bizzabo.
- Go to Reports / Registration / Attendees (exact naming varies by workspace and plan).
- Export to CSV or Excel.
Note: Bizzabo’s admin UI and export locations can vary by account setup (and permissions). If you don’t see an export button, ask your Bizzabo admin to export the registrants/attendees list for you.
Option B: Export via the Bizzabo API (useful when UI export isn’t available)
If you have technical access (or someone on your team does), Bizzabo’s REST API can return a full list of event contacts (including ticket holders) that you can then save as CSV for BadgeFlow.
Official documentation: List Contacts (Bizzabo REST API)
Quick rule of thumb: “Contacts” vs “Registrants/Attendees”
- Use Registrants/Attendees export when you want only people who are actually registered (most badge runs).
- Use Contacts if your event uses broader contact lists (invitees, prospects, non-ticket holders) and you intentionally want those included.
Step 2 — Clean up your CSV or Excel file (optional, but saves headaches)
You can often import the Bizzabo export as-is. But a quick tidy helps avoid awkward badge fields (like printing “N/A”).
Checklist
- Remove columns you won’t use (less clutter when mapping fields).
- Check name fields:
- If you have First Name and Last Name, great.
- If you only have a single Name column, also fine (BadgeFlow can use it directly).
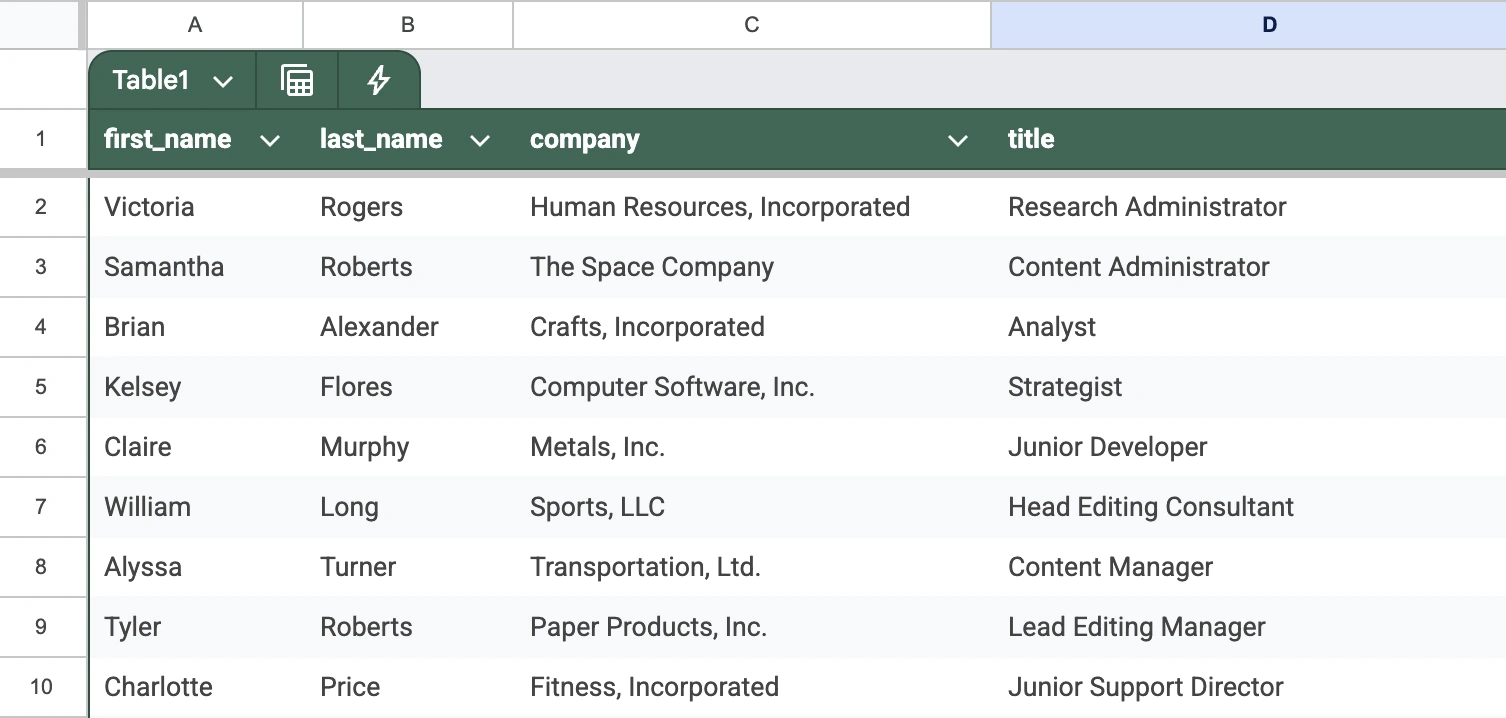
- If you collected custom registration fields (company, role, etc.), confirm those columns appear in the export.
- Standardise casing if you care (e.g., “alex” → “Alex”).
If your attendee data lives in a spreadsheet rather than a Bizzabo export, our guide on name badges from Excel covers column preparation tips that apply here too.
Step 3 — Import the Bizzabo CSV or Excel file into BadgeFlow
- Open BadgeFlow.
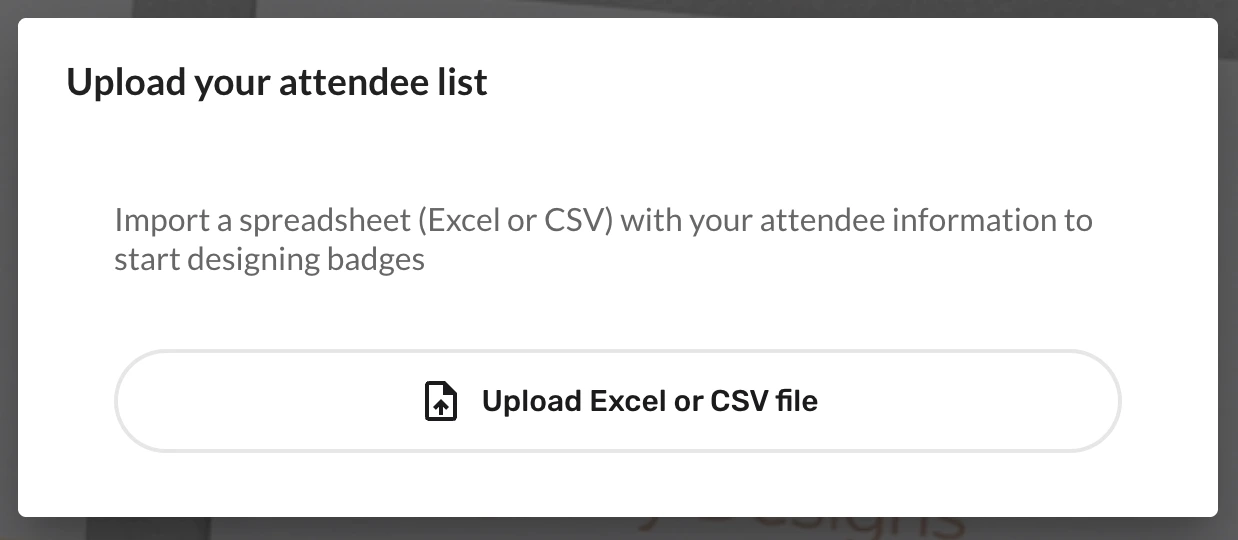
- Click Upload Excel or CSV file.
- Upload the file you exported from Bizzabo.
- Map CSV/Excel columns to badge fields (e.g., First Name, Last Name, Company, Role).
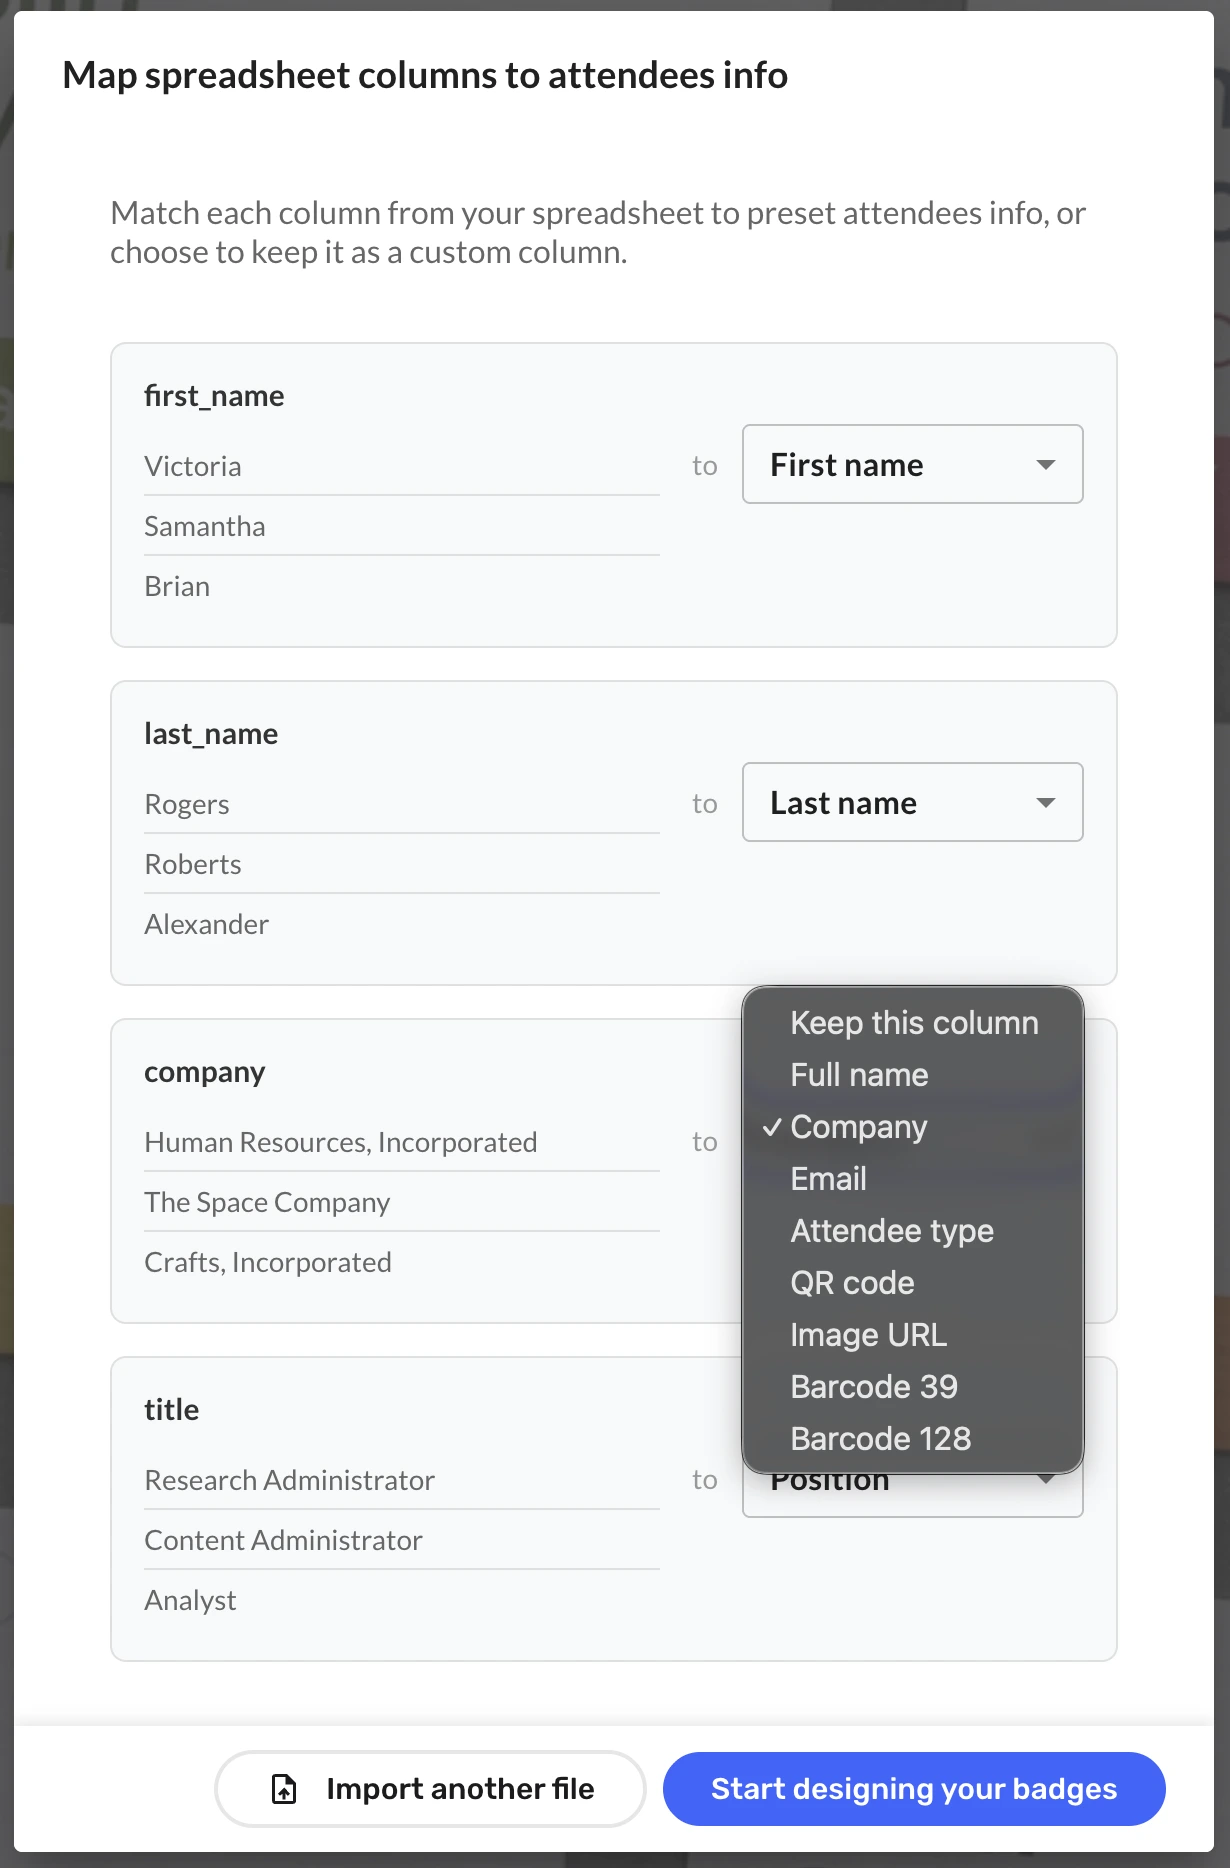
If you need scannable codes on your badges: QR code, Barcode 39 or Barcode 128
- Ensure your CSV/Excel export has a column with a unique value per attendee (e.g., registration_id, ticket_id, contact_id, or a custom “badge_code”).
- Map the unique column to a QR code, Barcode 39, or Barcode 128 field.
Common Bizzabo columns you’ll likely use on badges
- Name (or First Name + Last Name)
- Company (if collected)
- Job title / Role (if collected)
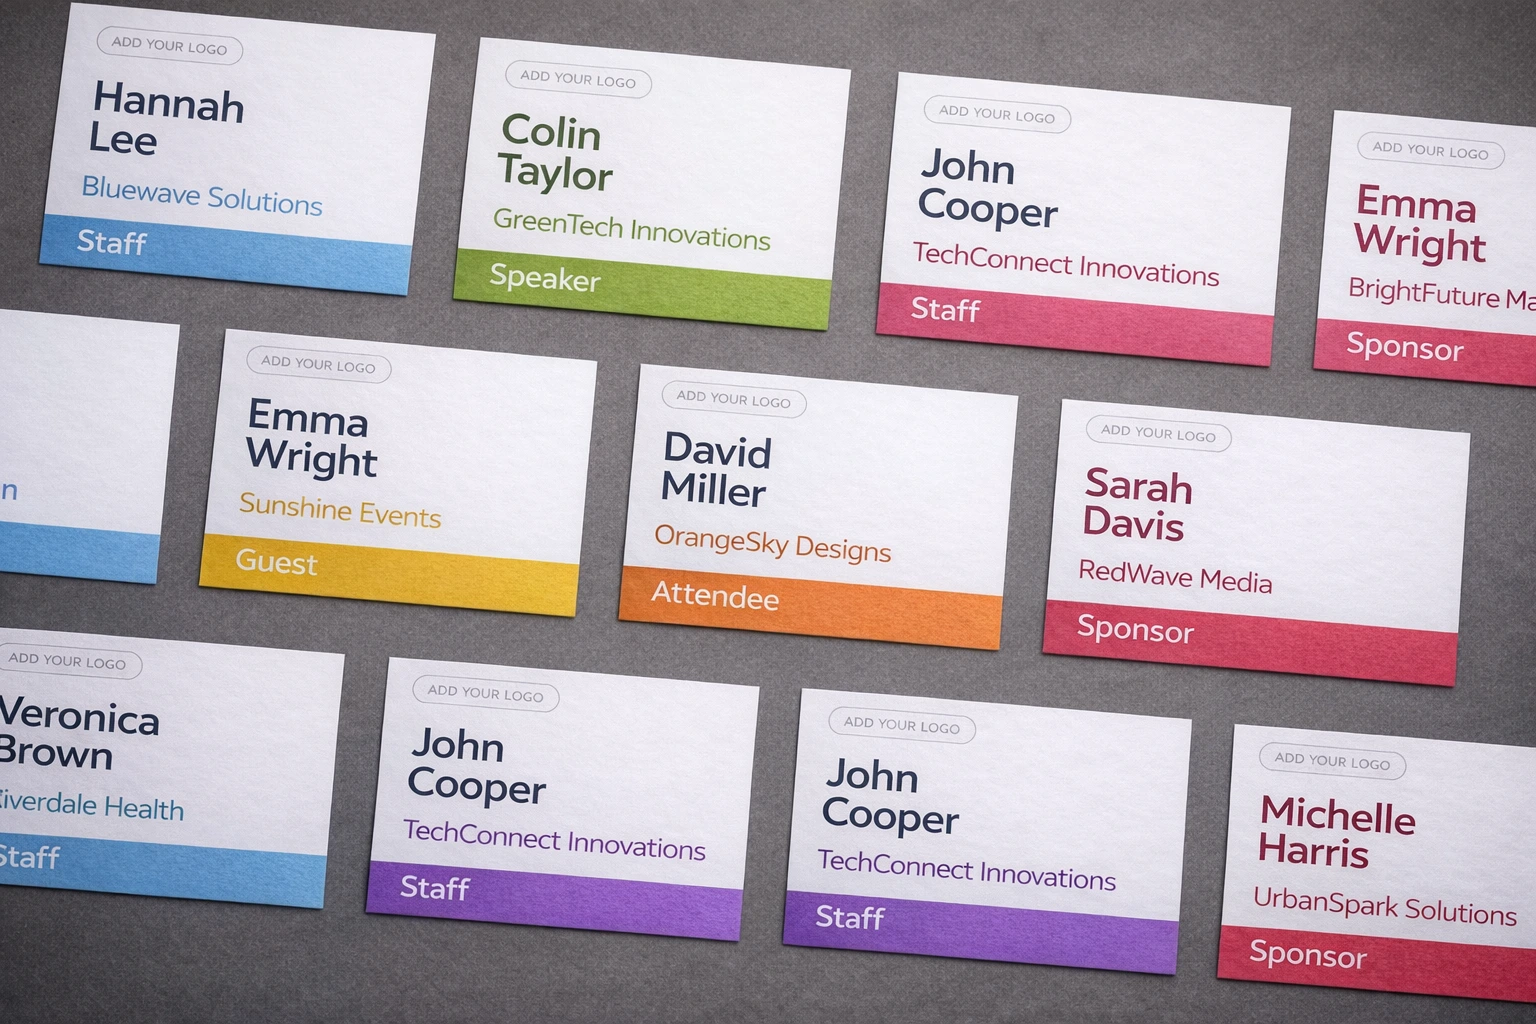
- Ticket type / pass (helpful for staff / VIP / speaker badges — see how to use colour-coded roles for company events)
- Email (optional; many organisers avoid printing it)
Step 4 — Pick a badge size and template
Now the fun bit: making it look professional without spending your entire life nudging text boxes.
- Select a badge size you need (standard options or custom dimensions).
![]()
- Select a badge template (30+ pre-designed professional templates to choose from).

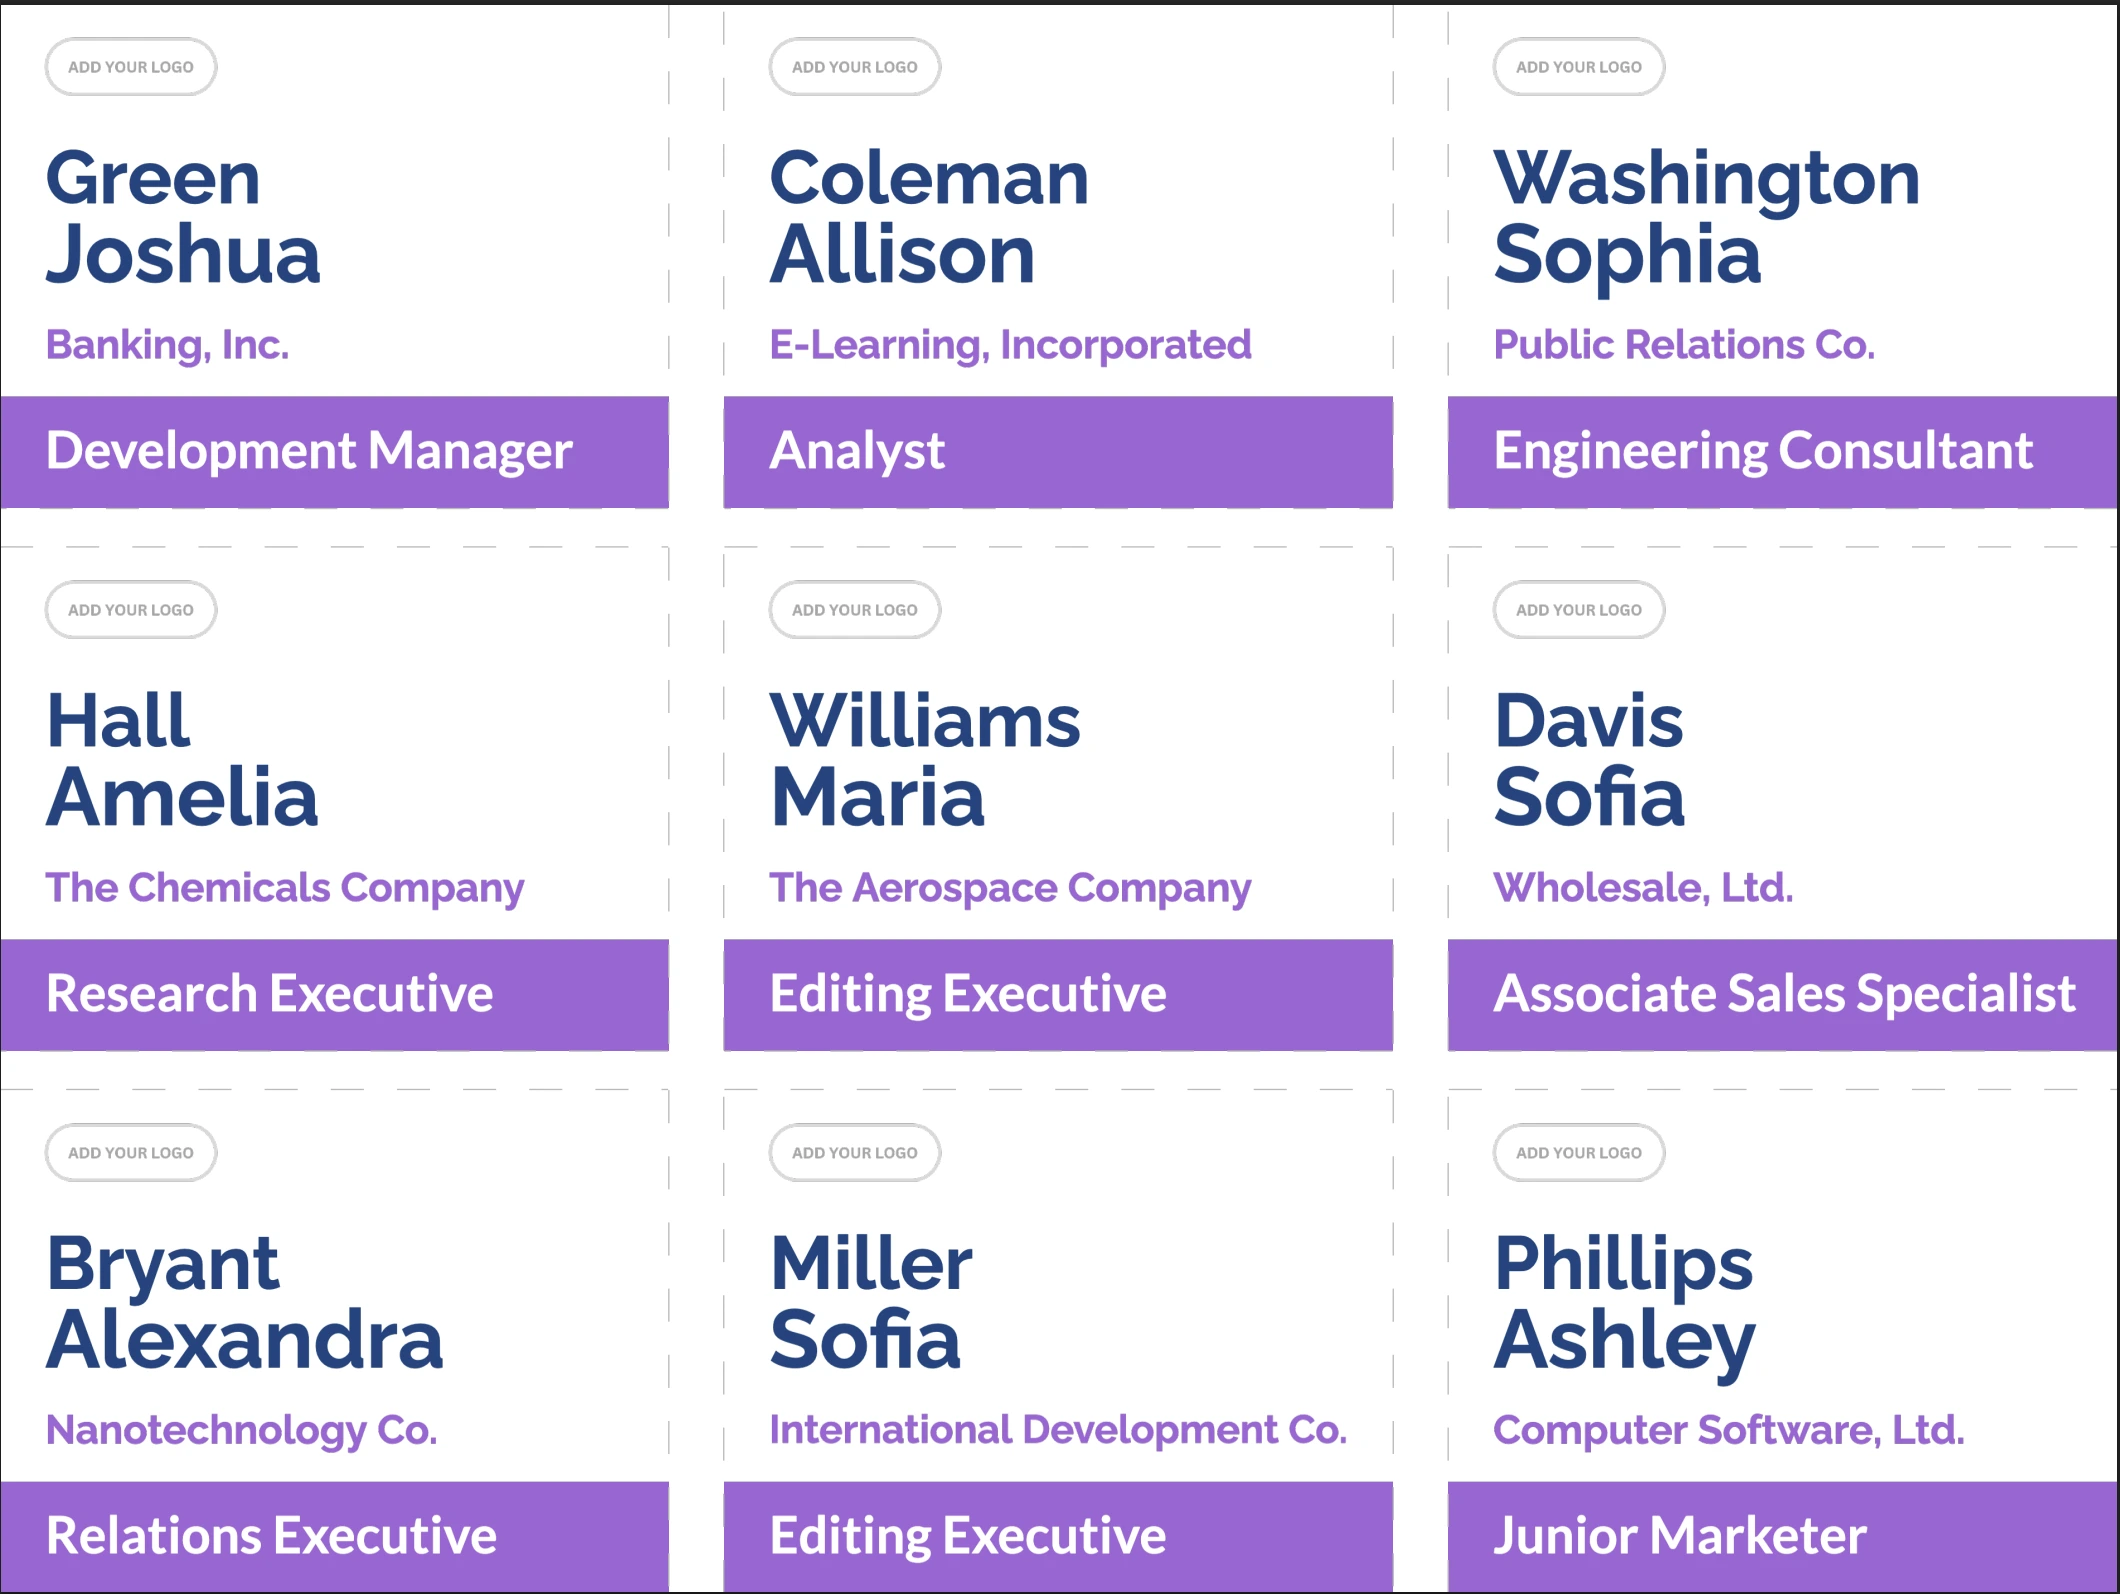
Badge design tips (the ones that actually prevent chaos onsite)
- Optimise for readability from 1–2 metres. Big names, high contrast, don’t get fancy with thin fonts.
- Make company smaller than name. People greet humans first.
- Keep the layout consistent. “Speaker” badges should look intentionally different (a colour stripe works well).
- Test print one page. Always. Printers are liars until proven otherwise.
For a deeper look at fonts, sizing, colour strategy, and layout hierarchy, see how to design conference name badges.
Step 5 — Customise the template (branding + extra fields)
Templates are just a starting point. In BadgeFlow’s intuitive drag-and-drop editor, you can quickly make the badge look like your event.
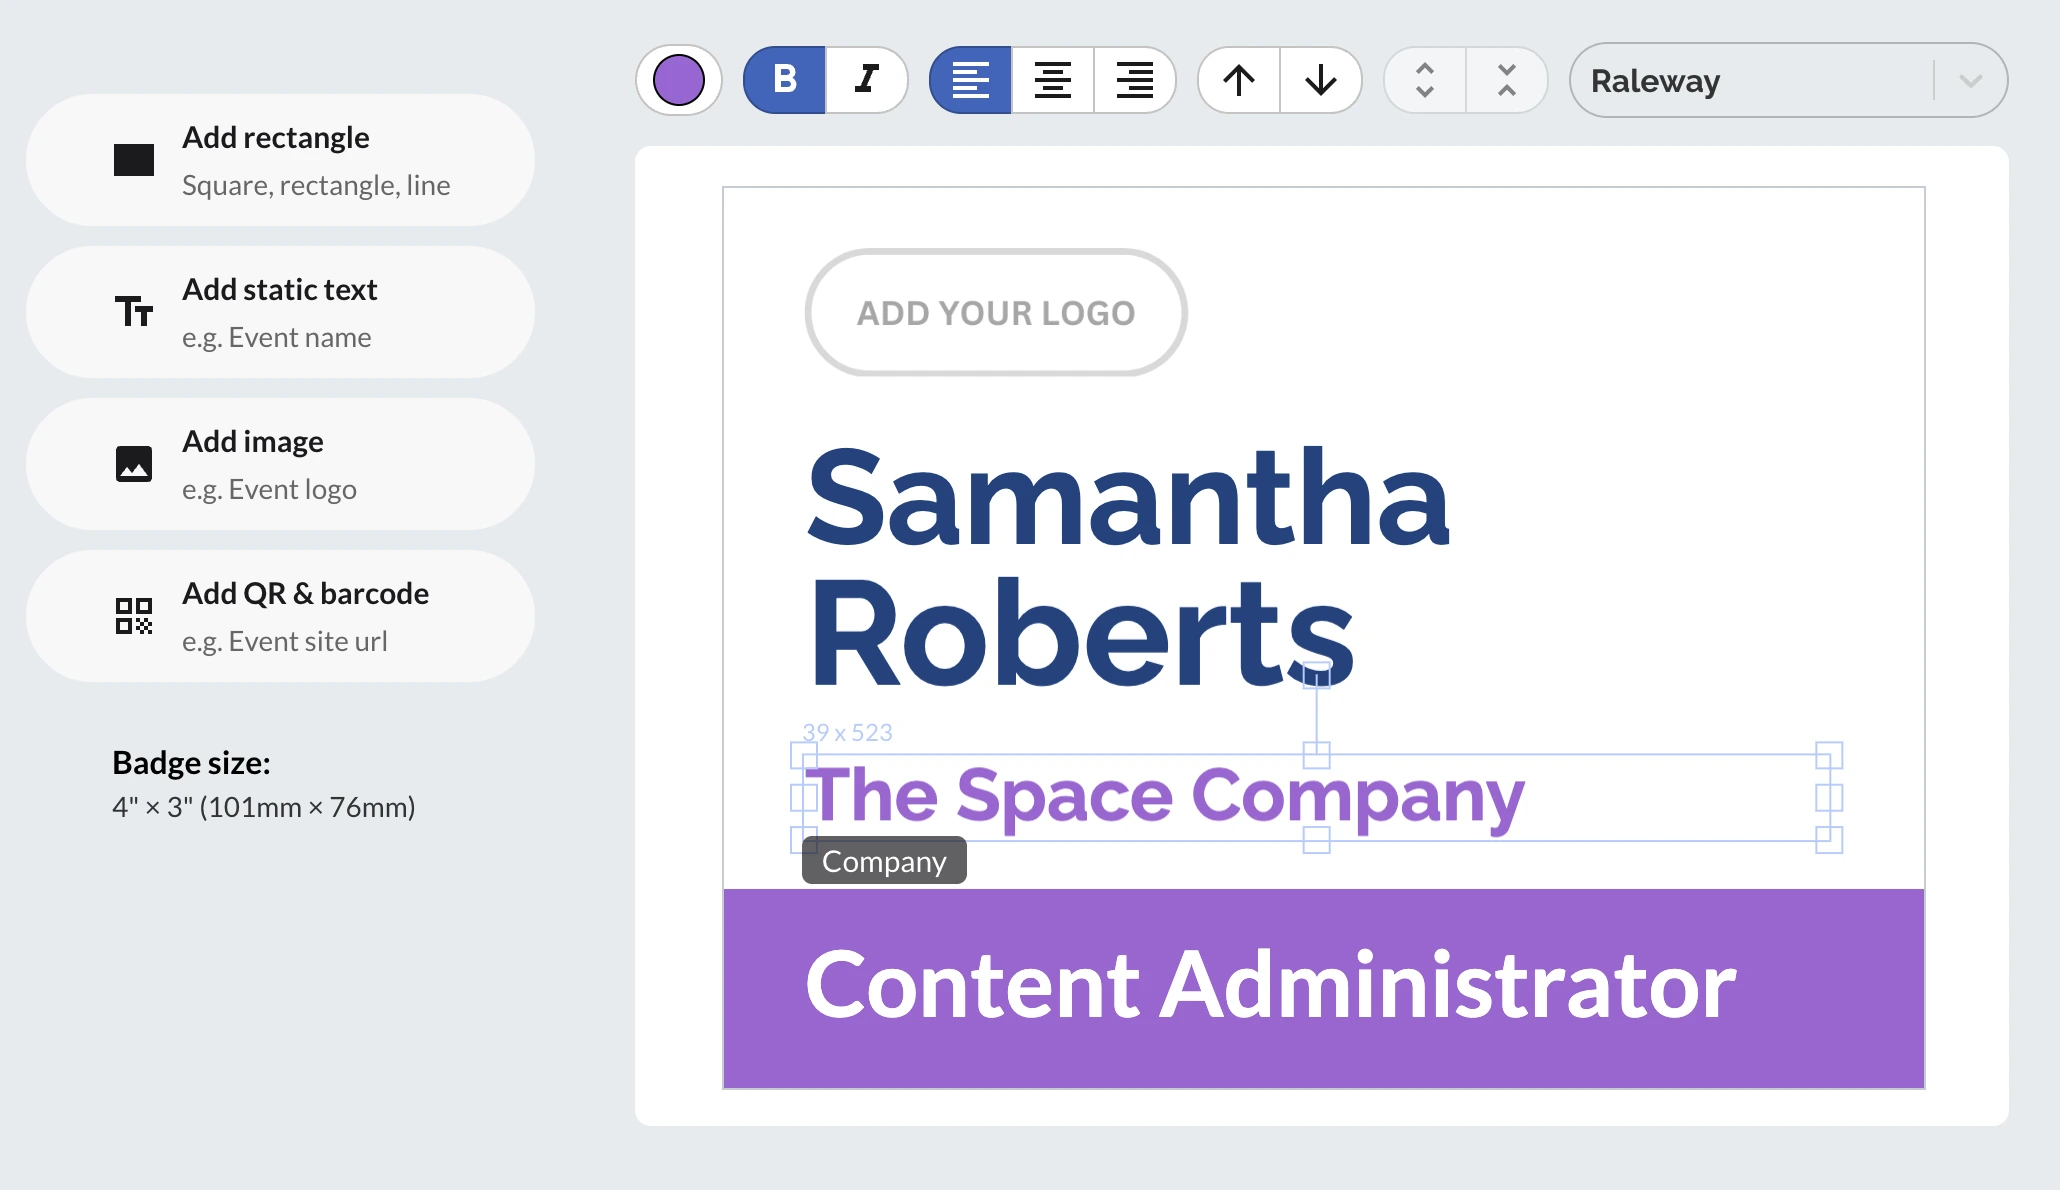
- Tweak styling: change colours, fonts, and spacing to match your branding.
- Add more dynamic fields: drop in extra columns from your spreadsheet (company, role, ticket type, etc.).
- Add static elements: logo, event name/date, labels like “STAFF” or “SPEAKER”, simple shapes/stripes.
- Add a static QR code: the same QR on every badge — perfect for linking to your code of conduct, Wi-Fi details, venue map, schedule, feedback form, or an “emergency info” page.
💡 Tip: Preview a few attendees (short names, long names, missing company) before exporting.
Step 6 — Set paper size
BadgeFlow supports any paper size — A4, Letter, or custom dimensions. Match your export to the paper or badge stock you’re actually using.
- Standard sheets (A4 / Letter): for printing on office paper.
- Badge stock size (for badge printers): if you’re printing on a dedicated badge printer, select the exact badge media size (the insert/stock your printer uses) — standard or custom. BadgeFlow supports any badge dimensions, so you can match your printer’s stock precisely and avoid scaling or cropped edges.
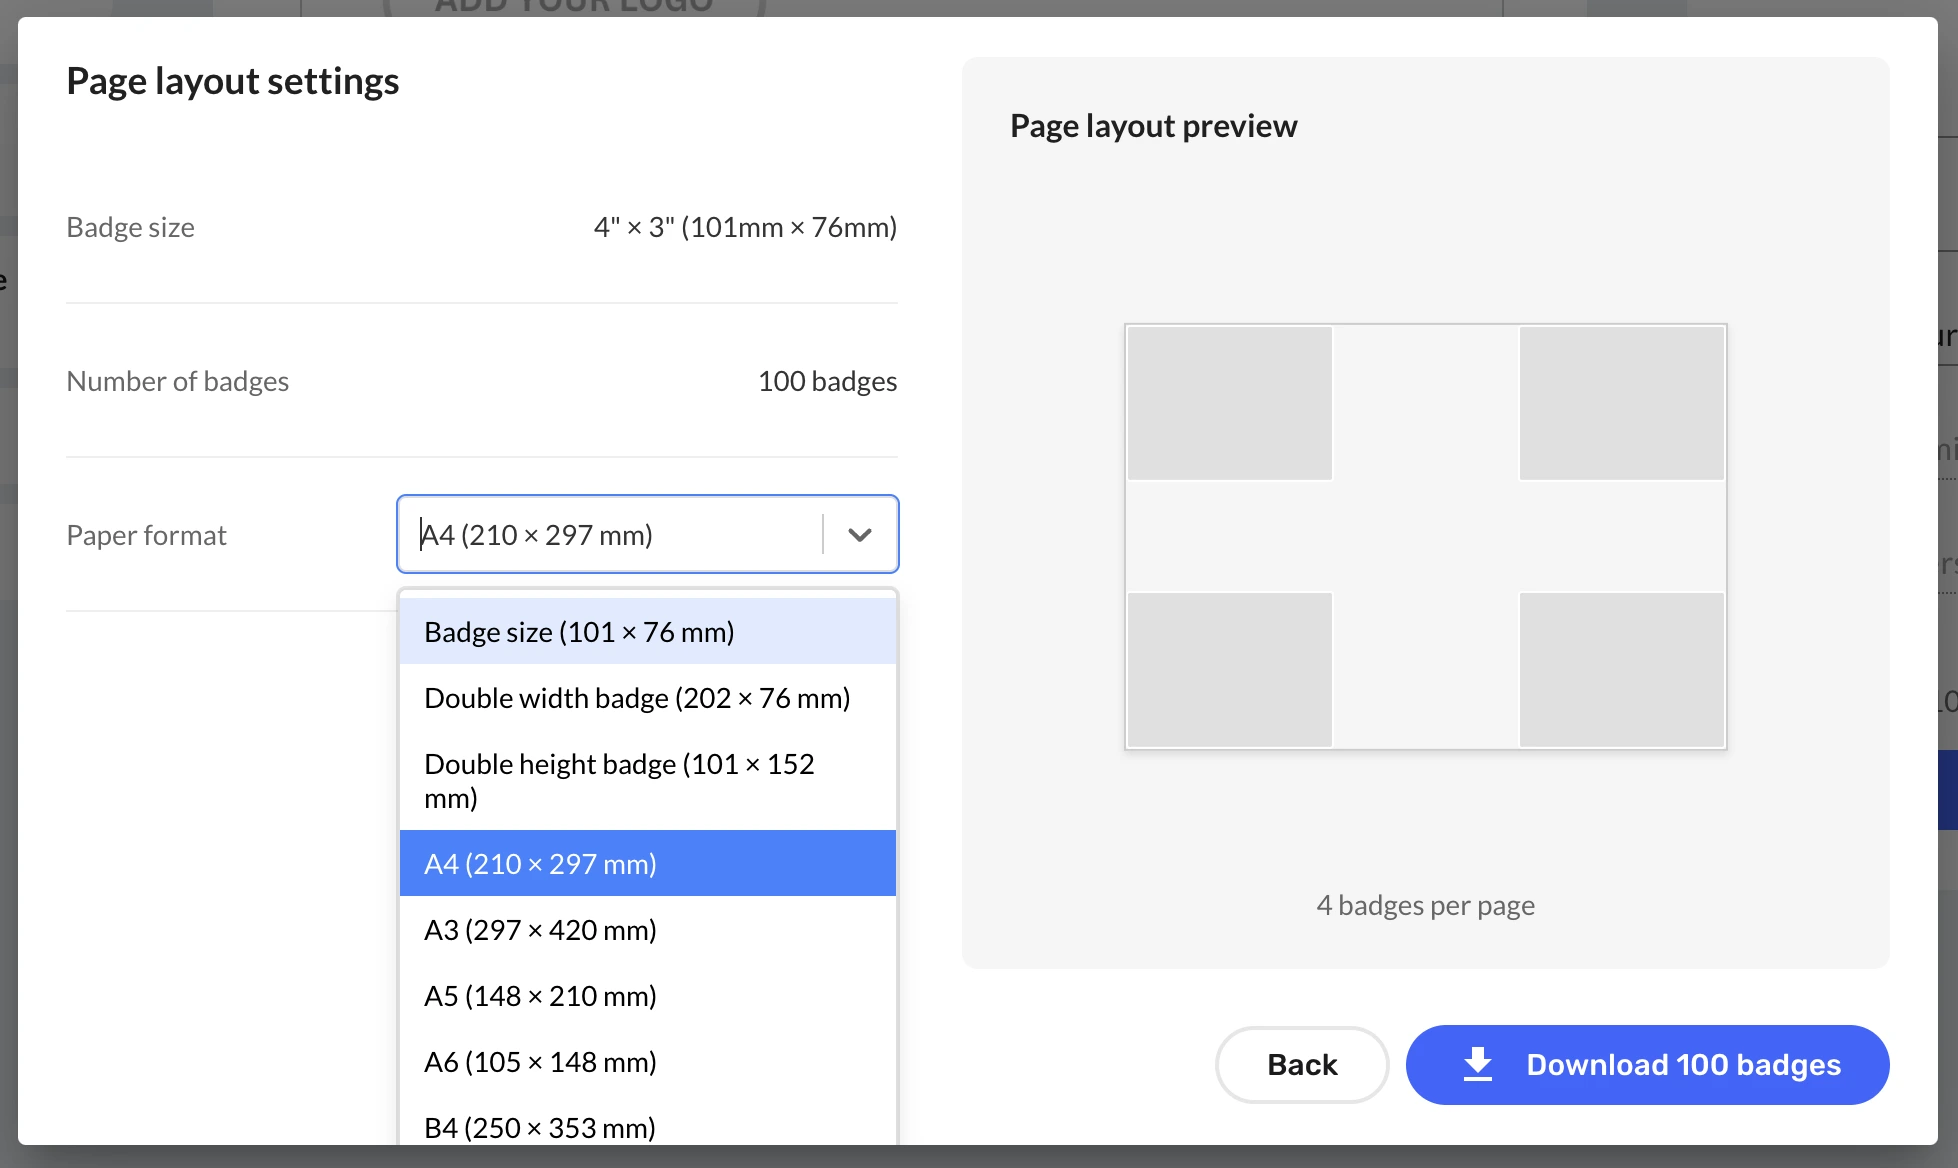
Step 7 — Generate your print-ready PDF
- Click Download badges in the bottom right corner of the screen.
- Select the correct paper size (BadgeFlow supports any paper size you need).
- Check the page layout preview to see how it will look.
- Download the print-ready name badges PDF.
Step 8 — Print without scaling (seriously)
The #1 way to ruin badge alignment is letting your printer “help”. When printing the PDF:
- Set scaling to Actual size or 100% (not “Fit”).
- Confirm the paper size matches your PDF.
- If using badge sheets: print one test page on plain paper first, then hold it behind a badge sheet up to a light.
⚡️ Troubleshooting (fast fixes)
"My badges are misaligned on the sheet"
- Check print scaling is 100%.
- Confirm the paper size is correct in both BadgeFlow export and printer settings.
- Do a single test page before printing the whole stack.
"Some names are too long"
- Reduce the name font slightly.
- Consider splitting into First Name (big) + Last Name (slightly smaller) for extreme cases.
"My company / role column isn’t in the export"
- Make sure the field is included in your export/report configuration.
- If it’s a custom registration field, confirm it’s enabled for reporting/export in your Bizzabo setup.
- If you exported “Contacts” and expected only registrants, export an attendees/registrants report instead (or filter down to ticket holders).
✅ Recommended workflow recap (the 90-second version)
- Export your registrants/attendees list from Bizzabo as CSV/Excel.
- Import the file into BadgeFlow.
- Map badge fields → pick a badge size and template → preview.
- Customise the template if needed (branding + extra fields).
- Export a print-ready PDF (any paper size you need) → print at 100%.
FAQ
Can I print Bizzabo name badges directly from Bizzabo?
Bizzabo can support onsite experiences depending on your setup, but some organisers prefer exporting attendees to a spreadsheet and using a dedicated badge generator for full layout control and print-ready PDFs (especially for A4/Letter sheets or pre-printing).
What should I export from Bizzabo for badges: Attendees/Registrants or Contacts?
Attendees/Registrants is best for “one badge per person who’s registered”. Contacts can include non-ticket holders (depending on your workflow), so use it only if you intentionally want a broader list.
Does this work for onsite badge printing?
Yes. If you can export an updated CSV/Excel (or keep a spreadsheet current), you can regenerate a new PDF quickly. For truly live printing, you’ll want a dedicated onsite setup (printer, stock, and a process for last-minute edits). See how developer meetup organisers handle onsite badge printing for a practical example.
Can I include QR codes on badges (for check-in or lead scanning)?
Yes — include a unique value per attendee (registration ID, contact ID, ticket ID, or a custom code) and map it to a QR/barcode field in BadgeFlow.
What about paper size — A4, Letter, or custom? Does it matter?
Yes. A4 and Letter are close enough to look “fine” until they’re very much not — and if you’re using badge stock or a dedicated badge printer, the exact dimensions matter even more. BadgeFlow supports any paper size. Match the PDF export and printer settings to the paper or badge stock you’re actually using.